Let’s be honest: most cat toys get batted twice and then forgotten under the couch. You spend $15 on some fancy feather contraption, and your cat plays with it for exactly 47 seconds before walking away to stare at a wall. The problem isn’t your cat, it’s that most toys don’t actually engage their natural instincts or challenge their brain. Cats get bored when toys are too predictable, too easy, or don’t offer any reward for interaction.
The toys in this guide are different. They’re designed to tap into what cats actually want: hunting, problem-solving, surprises, and yes, food rewards. These aren’t just objects to bat around, they’re activities that keep cats mentally and physically engaged for real stretches of time. Some are interactive (you control the action), others are solo enrichment that keeps working even when you’re busy. And the best part? They’re all made from stuff you probably already have at home.
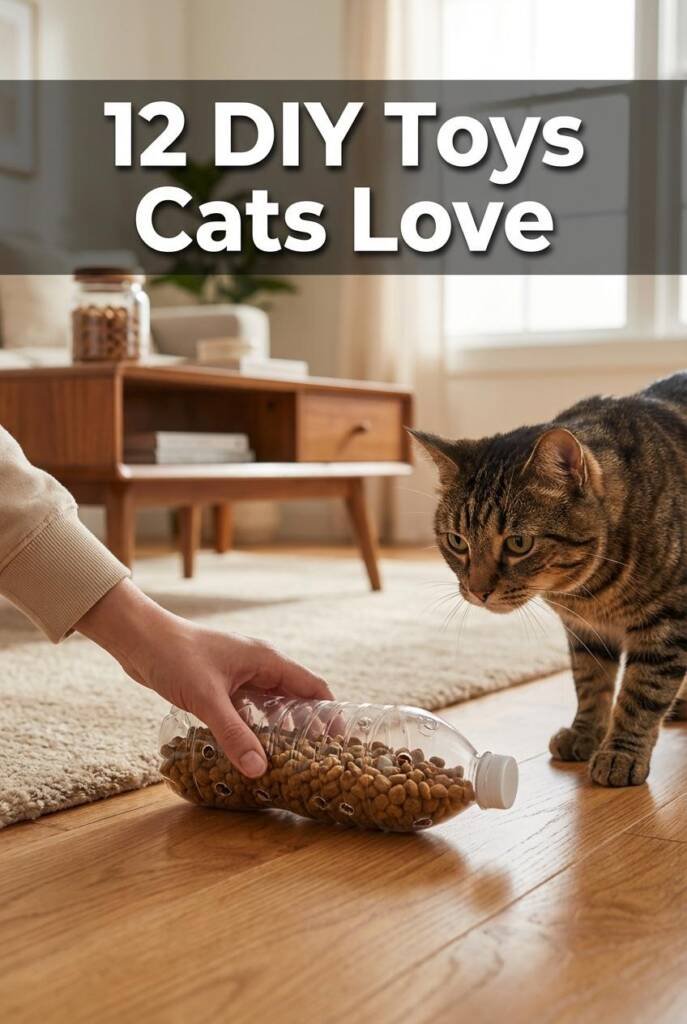
Start Playing Today: Top-Rated Cat Toys Under $15


1. The Muffin Tin Puzzle Feeder
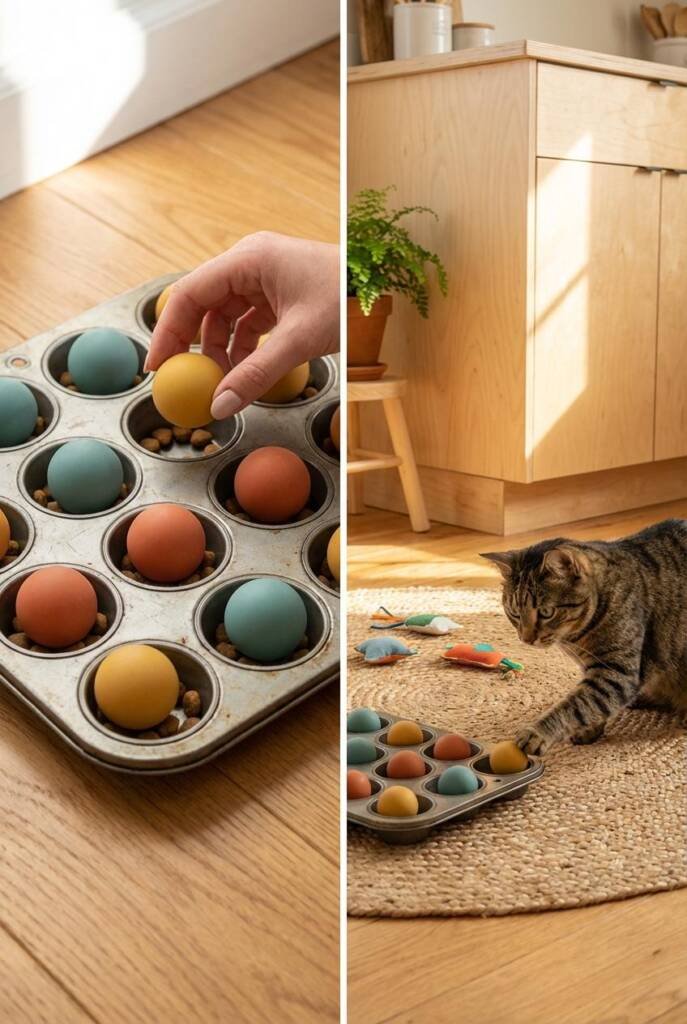
This one’s genius because it turns mealtime into a game. Instead of your cat inhaling food from a bowl in 30 seconds, they have to work for each piece. Cats are natural foragers and problem-solvers, in the wild, they’d spend hours hunting for multiple small meals throughout the day.
This puzzle feeder recreates that experience. Each muffin cup becomes a mini challenge, and the ping pong balls add just enough difficulty to keep them engaged without causing frustration.
Cats will spend 15-30 minutes working through this, and many will return throughout the day to check if you’ve refilled it. It’s especially great for cats who eat too fast, need to lose weight, or get destructive when they’re bored. You can adjust the difficulty level too—start easy and make it harder as your cat gets smarter.
Step-by-Step DIY
What you need
- Standard 12-cup muffin tin
- 12 ping pong balls (or tennis balls for larger tins)
- Cat treats or kibble
How to make it
- Place 3-5 treats or pieces of kibble in the bottom of each muffin cup
- Drop one ping pong ball into each cup to cover the treats
- Set the muffin tin on the floor in a spot where it won’t slide around (on a towel or non-slip mat works great)
- Show your cat what’s inside by lifting one ball out and letting them eat those treats
- Put the ball back and let them figure out they need to fish the balls out with their paws
Make it last longer: Start with only 6 cups filled if your cat’s new to puzzles. Once they master it, use balls that fit more snugly in the cups, or place the whole tin inside a shallow cardboard box so they can’t just tip it over. You can also use a mini muffin tin with smaller balls for an extra challenge.
2. Cardboard Box Puzzle Mansion
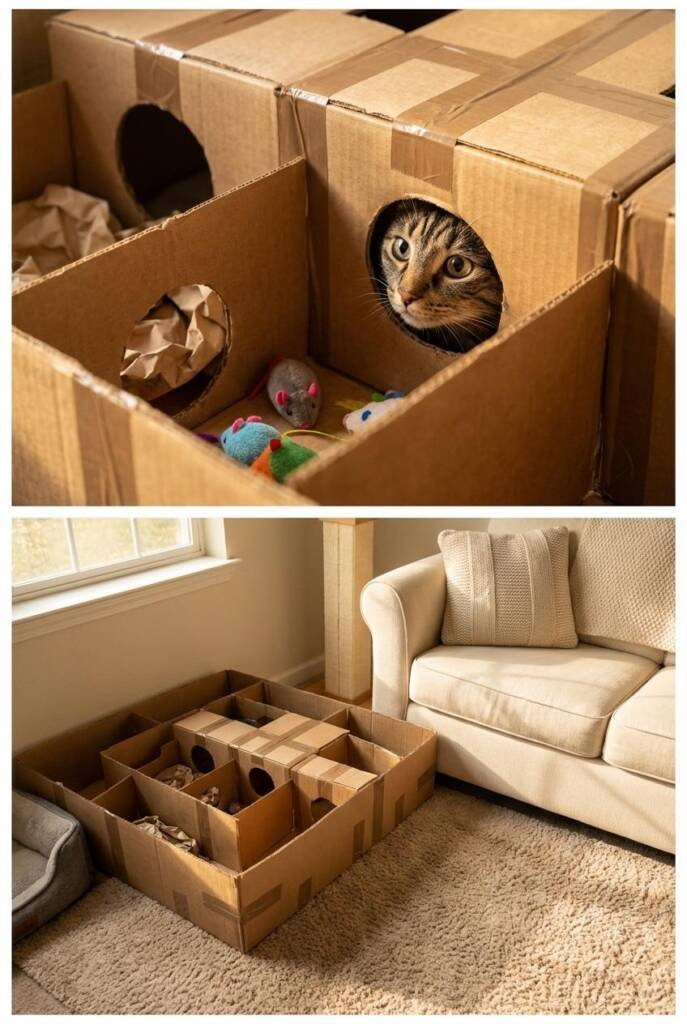
Cats are obsessed with boxes for a reason—they’re den animals who feel safe in enclosed spaces, but they’re also curious hunters who can’t resist exploring new territory. This multi-box setup creates an entire adventure playground that mimics tunneling through burrows and stalking prey through cover. The magic is in the unpredictability: your cat never knows if they’ll find a treat, a toy, another tunnel, or a dead end.
They’ll spend ages just exploring the different routes, poking their paws through holes, and ambushing invisible enemies. Unlike a single toy that gets old fast, this setup stays interesting because there are so many variables—different paths to take, different holes to investigate, different spots to hide. Cats will use this for weeks, especially if you occasionally rearrange the boxes or hide new surprises inside. It’s basically free enrichment that also doubles as furniture for cats who like vertical spaces.
Step-by-Step DIY
What you need
- 3-5 cardboard boxes (mix of sizes: shoeboxes, medium shipping boxes, maybe one large)
- Box cutter or strong scissors
- Packing tape or duct tape
- Crinkle paper, small toys, or catnip sachets (optional)
How to make it
- Grab your first box and cut 3-4 holes in random spots—sides, top, even the bottom if you’re stacking. Make them about 3-4 inches wide so your cat can fit through comfortably
- Do the same with each box, making sure every box has at least two holes so cats can’t get trapped
- Arrange your boxes however you want—stack some, line some up side by side, get creative with the layout
- Tape boxes together securely wherever they touch so the whole thing doesn’t collapse mid-exploration
- Where two boxes meet, cut connecting holes to create tunnels between chambers
- Toss treats, small toys, or catnip sachets into random boxes to encourage exploration
- Add crinkle paper or tissue paper in a few boxes for sound enrichment
- Cut a few smaller “peek-a-boo” holes (2 inches) at cat eye level so they can swat through
Make it last longer: Move treats to different boxes every few days so they never know where to find them. Completely rearrange the box configuration once a month. Add new boxes or remove old ones to keep it fresh.
3. Toilet Paper Roll Treat Dispenser Tower
This toy works because of intermittent rewards—the same psychological trick that makes gambling addictive, but way cuter and healthier. Your cat bats the tower around, and treats randomly fall out through the holes. They never know exactly when or where the next treat will appear, so they keep trying. It’s basically a slot machine for cats.
The physical activity of pawing, pushing, and knocking the tower around combines with the mental challenge of figuring out which angle makes treats fall out. Cats can easily spend 20 minutes working on this, and because you can refill it, it never becomes useless like those one-and-done toys. It’s perfect for high-energy cats who need to burn off steam, anxious cats who need distraction, or any cat who’s food-motivated. Plus it’s dead simple to make and costs literally nothing.
Step-by-Step DIY
What you need
- 6-8 empty toilet paper rolls
- Piece of cardboard for the base (cereal box cardboard is perfect)
- Hot glue gun or strong tape
- Dry treats or kibble
- Scissors
How to make it
- Cut your base cardboard into a square about 8×8 inches (doesn’t have to be exact)
- Take each toilet paper roll and cut random holes in it—different sizes from dime-sized to quarter-sized, about 2-4 holes per roll
- Fold one end of each roll flat and tape or glue it shut so treats can’t fall out the bottom
- Stand all your rolls upright on the cardboard base and arrange them in a cluster—pack them close together so they support each other
- Hot glue or tape the bottom of each roll to the base so they don’t just fall over immediately
- Fill each roll about halfway with treats by dropping them in the open top
- Leave the tops open or fold them loosely closed—cats need to smell the treats inside to stay motivated
- Put it on the floor and watch your cat go to town batting it around
Make it last longer: Cut holes slightly smaller than your treats so only one or two fall out at a time. Use different sized holes in different rolls so some are easier than others. Refill when empty and your cat will keep coming back.
4. The Fishing Pole Feeder Toy
This is the heavyweight champion of cat toys because YOU control the prey, which means you can make it act exactly like a real animal trying to escape. Cats don’t get bored because the movement is never the same twice. A mouse doesn’t run in circles at the same speed—it darts, freezes, hides, runs again. You can recreate that, and it triggers every single hunting instinct your cat has.
This is the toy that actually tires cats out, not just physically but mentally, because they’re planning, stalking, calculating, and pouncing. A good 20-minute session with a fishing pole toy will leave your cat satisfied and calm in a way that passive toys never achieve. It’s also bonding time—you’re playing together, which strengthens your relationship. And because you can swap out different lures (feathers, fabric, ribbons), it never gets stale.
Step-by-Step DIY
What you need
- Wooden dowel, stick, or old fishing rod (3-4 feet long works best)
- Strong string or fishing line (about 3 feet)
- Feathers, fabric scraps, felt, or old ribbons
- Small bell
- Catnip (optional)
- Hot glue gun or needle and thread
How to make it
- Tie your string securely to one end of the dowel—wrap it a few times and double-knot it so it doesn’t come loose during intense play
- Now make your lures (make a few so you can switch them out):
- Feather bundle: Gather 5-7 feathers, tie them together tightly at the base with string, add a small bell, done
- Fabric mouse: Cut two mouse shapes from felt, stuff with crinkle material and catnip, sew the edges shut, add a string tail
- Ribbon explosion: Cut 6-8 pieces of ribbon about 6 inches long, tie them all to a small felt circle so they dangle
- Attach a small paperclip or keyring to the free end of your string so you can easily swap lures
- Clip or tie your chosen lure onto the string
- Time to hunt: drag it slowly across the floor, hide it behind furniture, make it “run” in short bursts, let it fly through the air, pause it suddenly
Make it last longer: Let your cat actually catch the prey every 3-4 attempts or they’ll get frustrated and quit. Always end play sessions with a final successful catch plus a treat—this mimics a real hunt and leaves them satisfied. Store the toy with the lure detached so cats can’t play unsupervised and tangle themselves.
5. The Whack-a-Mole Shoebox Game
Remember whack-a-mole at arcades? Cats are obsessed with the same concept. Something pops up, they smack it, it disappears—repeat forever. This taps directly into their pouncing instinct and their prey drive for small, quick-moving objects. The unpredictability is key: they never know which hole something will pop out of next, so they stay alert and focused.
This is interactive play that strengthens your bond while giving your cat a serious mental workout. They’re tracking movement, making split-second decisions, and coordinating attacks. Fifteen minutes of this will mentally exhaust a cat way more than batting a ball around. It’s especially good for kittens with crazy energy, indoor cats who need stimulation, or older cats who need low-impact exercise that keeps their brain sharp.
Step-by-Step DIY
What you need
- Shoebox with lid
- 5-6 small lightweight toys (pom poms, corks, crinkle balls, feathers tied to short strings)
- Box cutter or scissors
- Ruler and marker
How to make it
- Take the shoebox lid and use your ruler to mark 4-6 circles evenly spaced across it—make them about 2-3 inches wide
- Cut out those circles carefully so you have clean holes
- Snap the lid onto the box
- Sit on one side of the box with your cat on the other side
- Poke a toy up through one of the holes—just a little peek at first
- When your cat looks, make it pop up higher, wiggle it, pull it back down fast
- Randomly switch between holes—fast pops, slow rises, wiggling in place, double fakes
- Let your cat swat at the toys and occasionally let them “catch” one by pulling it through to their side
Make it last longer: Cut one hole slightly bigger than the others so some toys can be fully pulled through—cats love winning. Use toys with different textures and sounds (crinkly, jingly, soft) to keep it interesting. Between rounds, shake the box so your cat hears toys rattling inside and stays curious.
6. Plastic Bottle Treat Roller
This is pure problem-solving enrichment. Your cat has to figure out that if they roll this weird crinkly thing around, food randomly falls out. The unpredictability keeps them engaged—sometimes treats fall out immediately, sometimes they have to work for it. The bottle rolls erratically because of its shape, which makes it more interesting than a ball that just goes in a straight line.
Cats will chase it around, bat it, pick it up, knock it down the hallway, whatever it takes to get those treats. The crinkling sound adds another layer of stimulation. This toy is perfect for cats who scarf food too fast, need more activity, or get destructive when bored. It turns eating into a 20-30 minute activity instead of a 30-second inhale session. And you can adjust difficulty by changing hole size and treat size.
Step-by-Step DIY
What you need
- Clean plastic bottle with lid (16-20 oz water or soda bottle works great)
- Scissors or box cutter
- Dry cat treats or kibble
- Sandpaper or nail file (optional)
How to make it
- Remove all labels from your bottle and wash it thoroughly—let it dry completely
- Cut 4-6 holes around the bottle in random spots, each about the size of a nickel to quarter (adjust based on your treat size—treats should barely fit through)
- If the cut edges are sharp, sand them smooth with sandpaper or a nail file so your cat doesn’t cut their tongue
- Drop a handful of treats or kibble inside—start with about 1/4 cup
- Screw the lid back on tight
- Give it to your cat and let them figure out that rolling it makes food appear
Make it last longer: Start with bigger holes so they experience success quickly, then make the next bottle harder with smaller holes. Use different bottle sizes—smaller bottles roll faster, bigger ones are more challenging. Mix in some treats that smell really strong to keep them motivated even when it gets tricky.
Not Feeling Crafty? These Do the Same Thing for $10-15

7. The Cardboard Tube Ball Track

This is essentially a marble run for cats, except instead of marbles, it’s ping pong balls they can see but can’t quite reach. The frustration factor is actually what makes it so engaging—cats are persistence hunters who will work at a challenge for ages if they think there’s even a small chance of success.
They’ll paw at the balls through the holes, watch them roll, try to predict where they’ll go, and occasionally succeed in fishing one out, which keeps them coming back. It’s visual stimulation, physical activity, and problem-solving all in one. The best part is that once you set it up, it works on its own. Your cat can play with this solo while you’re working from home or making dinner. Cats have been known to spend 30-45 minutes at a time just batting balls back and forth through these tracks.
Step-by-Step DIY
What you need
- 4-6 paper towel tubes or wrapping paper tubes
- Large piece of cardboard for mounting (pizza box lid or side of a box works)
- Packing tape or duct tape
- 3-4 ping pong balls
- Box cutter or scissors
- Marker
How to make it
- Lay your tubes on the cardboard and plan your track layout—you can make it straight, curved, or multi-level. Draw light marks where each tube will go
- Cut random holes along each tube (about 2 inches diameter)—enough that cats can see and reach the ball, but not so many that balls fall out too easily
- Tape the tubes to the cardboard backing, making sure they’re secure and won’t roll off
- If you want multiple levels, stack and connect tubes at different heights using small cardboard ramps or connectors
- Make sure there’s an opening at each end of every tube so balls can roll through
- Drop ping pong balls into the tubes
- Mount your track on the floor along a wall, or lean it at a slight angle against furniture so balls naturally roll
Make it last longer: Add tubes as your cat masters the current setup. Create intersections where tubes connect so balls can change paths. Use different sized balls—some roll fast, some roll slow. Place it near a window so cats can watch it while also watching outside.
8. The Felt Catnip Kicker Toy
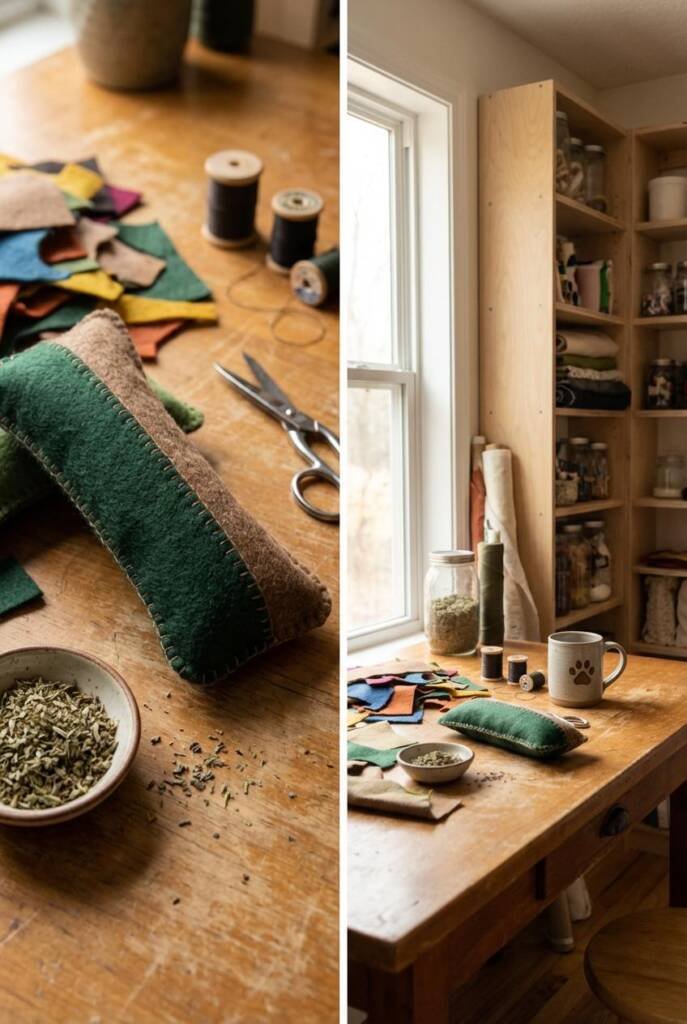
Cats have a specific play behavior where they grab something with their front paws and kick the hell out of it with their back legs—it’s how they’d disembowel prey in the wild. Most store-bought kicker toys are too small, too light, or not satisfying to grab. This DIY version is stuffed firm enough to feel substantial, filled with catnip to make them go feral, and sized perfectly for aggressive bunny-kicking.
Cats will wrestle with this thing for 10-15 minutes in intense bursts, then carry it around the house like a trophy. The crinkle material inside adds sound stimulation, and because you can refill the catnip, it stays potent. This is especially great for high-energy cats, cats with hunting instincts they need to satisfy, or cats who play rough and destroy everything else.
Step-by-Step DIY
What you need
- Felt fabric (two pieces about 12 inches x 5 inches each)
- Dried catnip (about 2 tablespoons)
- Stuffing (polyfill, fabric scraps, or even clean old socks cut up)
- Crinkle material (chip bag or parchment paper)
- Needle and thread or sewing machine
- Scissors
How to make it
- Cut two identical rectangles from felt—about 12 inches long and 5 inches wide (roughly the size of a cat’s body when they hug something)
- Place the two pieces together, patterned sides facing in if your felt has a pattern
- Sew around three sides, leaving one short end open. If you’re hand-sewing, use small stitches so it doesn’t burst during aggressive play
- Turn it right-side out through the open end
- Stuff it firmly—start with a layer of regular stuffing, then add a layer of crinkle material, then sprinkle in the catnip, then more stuffing. Pack it relatively tight so it doesn’t feel floppy
- Sew the open end shut with strong stitches
- Optional: sew a few extra reinforcement stitches across the middle to create a slight curve, which makes it easier for cats to grab
Make it last longer: Make two or three so you can rotate them—put one away for a week while they play with another, then swap. The catnip will seem “new” again. When the catnip smell fades (usually after a few weeks), you can carefully open a seam, add fresh catnip, and sew it back up.
9. The Peek-a-Boo Tissue Box
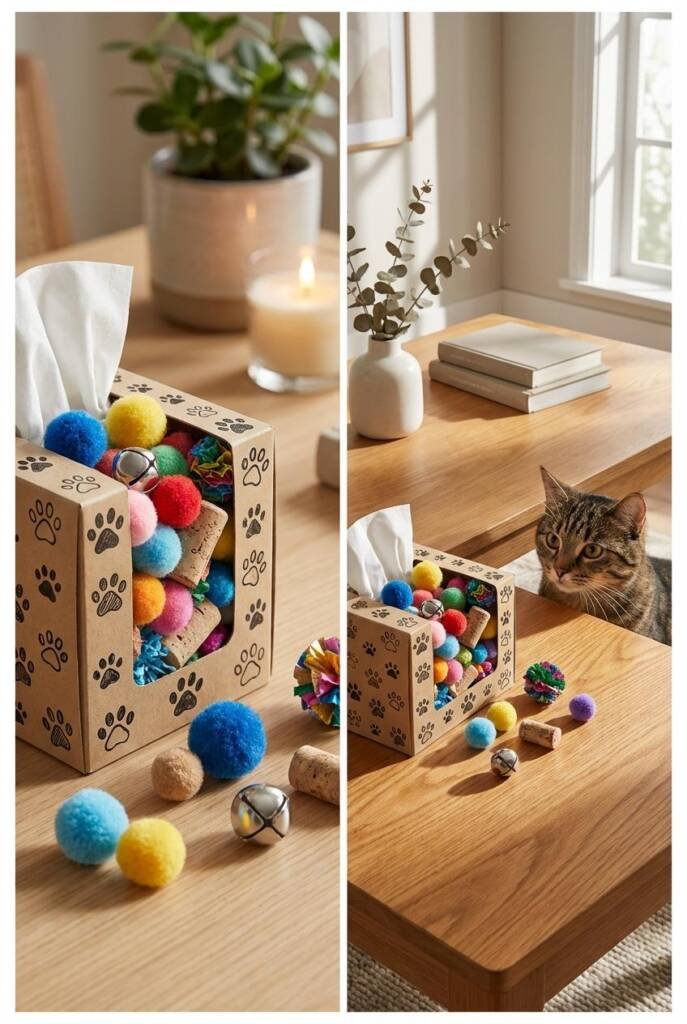
Cats are ambush predators, which means they’re hardwired to investigate small spaces where prey might be hiding. An empty tissue box becomes an irresistible mystery—they can see something moving inside, hear it, smell it, but they have to work to get it out.
This combines hunting behavior with problem-solving. Cats will spend ages fishing toys out one by one, and because the toys go back in easily, you can reset this in two seconds. It’s perfect for when you need your cat occupied while you’re on a call or cooking. The tissue box opening is just the right size to be challenging without being impossible, and cats love that they can get their whole paw in there to explore.
Step-by-Step DIY
What you need
- Empty tissue box (the rectangle kind with the oval opening on top)
- 8-10 small toys (pom poms, ping pong balls, crinkle balls, wine corks, small stuffed mice)
- Catnip or treats (optional)
- Scissors
How to make it
- Remove any plastic film from inside the tissue box opening
- Fill the box about halfway with your small toys—variety is good because different textures keep it interesting
- If you want extra motivation, sprinkle a tiny bit of catnip inside or drop a few treats in
- Close the box back up if it has a reclosable bottom, or just set it opening-up on the floor
- Give it a shake so your cat hears things rattling inside
- Let them discover they can fish toys out through the opening
Make it last longer: Once your cat pulls everything out, just drop the toys back in and they’ll go for round two. Use toys that smell interesting (catnip mice) or sound interesting (jingle balls). Every few days, swap out the toys inside for different ones so there’s variety. You can also cut a few small holes in the sides of the box to create additional challenge openings.
10. The Sock Snake
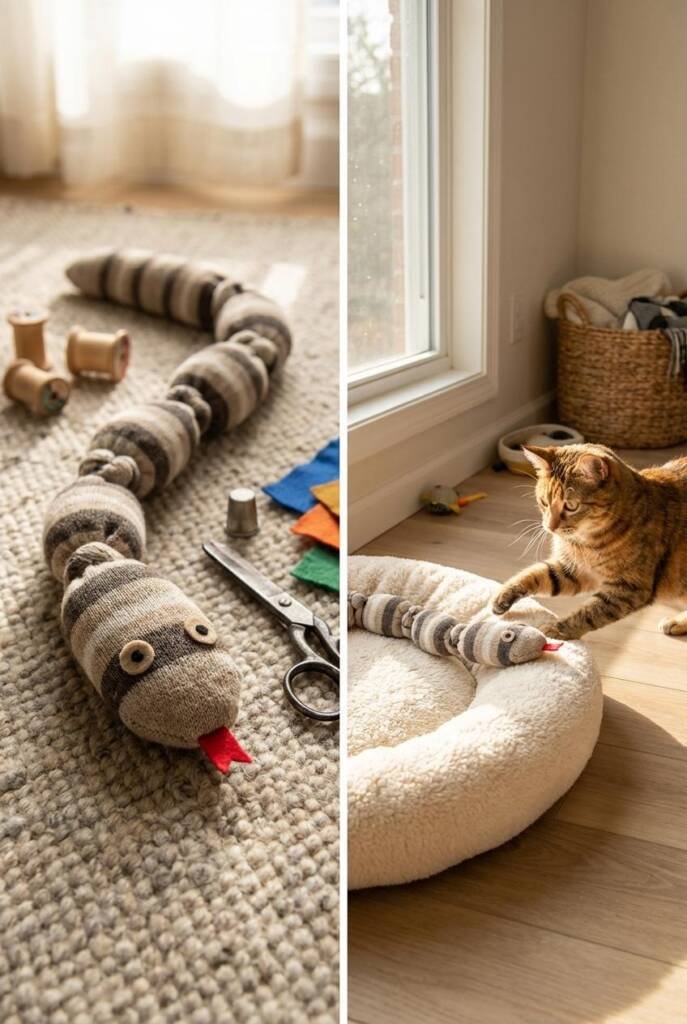
This toy is ridiculously simple but insanely effective because it triggers cats’ instinct to wrestle with long, snake-like prey. The key is making it long enough and stuffed firm enough that it feels like a worthy opponent. Cats will grab it with their front paws, kick it with their back legs, carry it around, and thrash it against the floor.
The crinkle inside makes it sound alive, and if you add catnip, they’ll go absolutely nuts. This is the toy cats will play with independently—they don’t need you to operate it. You’ll find your cat randomly attacking it throughout the day. It’s especially good for cats who get the “zoomies” at 3am because they can wrestle this solo without waking you up.
Step-by-Step DIY
What you need
- One long sock (knee-high or over-the-knee works best)
- Stuffing (polyfill, fabric scraps, or cut-up old socks)
- Crinkle material (candy wrappers, parchment paper, or tissue paper)
- Catnip (optional but recommended)
- Needle and thread
- Ribbon or felt scraps for decoration (optional)
How to make it
- Take your sock and stuff it firmly from the toe upward—alternate layers of regular stuffing with crinkle material
- Every few inches, sprinkle in a little catnip if you’re using it
- Keep stuffing until the sock is full and firm—it should feel solid enough to wrestle with, not floppy
- Sew the open end shut with several strong stitches
- Optional: sew or glue on felt triangles for eyes and a tongue, or tie small ribbons along the length to create a rattlesnake effect
- Tie a knot or two along the snake’s length to create segments, which makes it easier for cats to grab
Make it last longer: Make it long enough that it’s actually challenging—18-24 inches is ideal. If your cat destroys fabric toys, use a tougher sock material like wool or thick cotton. Refresh the catnip every month by making a small opening, adding more, and sewing it back up.
11. The Foraging Mat
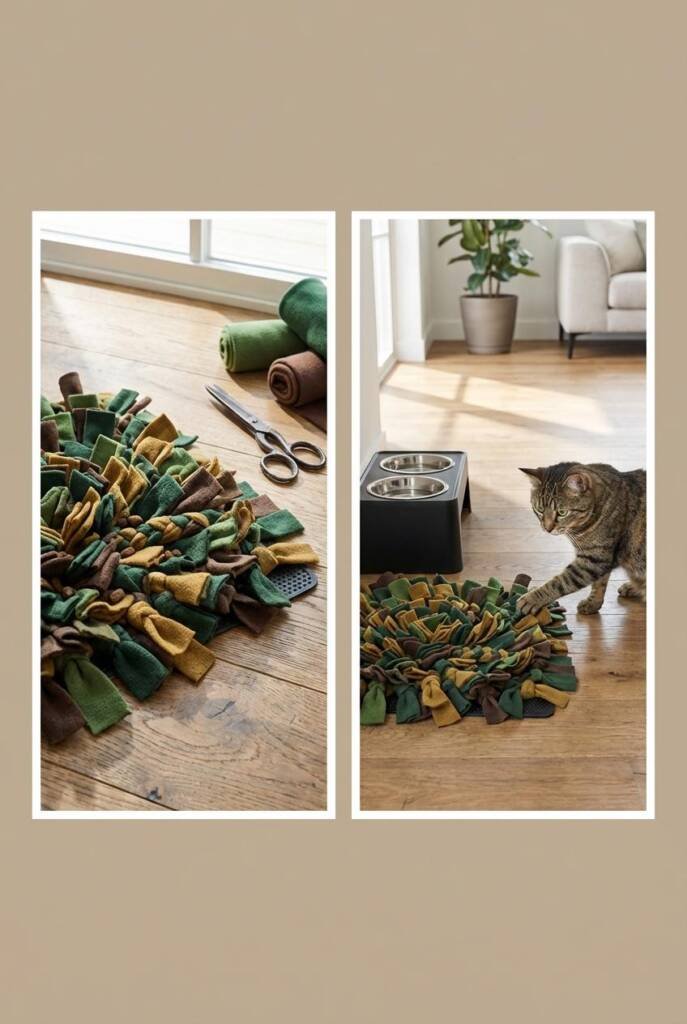
In the wild, cats don’t eat from bowls—they hunt multiple small prey throughout the day and work for every meal. A foraging mat recreates that experience by hiding kibble or treats in fabric strips that cats have to nose through and paw apart to find food. This turns feeding time into a 20-30 minute activity that’s mentally exhausting in the best way.
It slows down fast eaters, gives indoor cats something purposeful to do, and satisfies their natural foraging instincts. Cats will return to this multiple times a day to check if you’ve hidden more food. It’s especially valuable for cats who beg constantly or get destructive out of boredom—a tired, mentally stimulated cat is a well-behaved cat.
Step-by-Step DIY
What you need
- Rubber sink mat or bath mat with holes (about 12×12 inches)
- Fleece fabric strips (about 1 inch wide and 8 inches long—you’ll need 50-100 strips depending on mat size)
- Scissors
- Dry cat treats or kibble
How to make it
- Cut your fleece into strips—don’t worry about perfection, rough cuts work fine and fleece doesn’t fray
- Take one strip and thread it through a hole in your rubber mat from the bottom
- Pull both ends up so they’re even on top
- Tie the strip in a simple knot right at the mat surface so it stays put
- Repeat this process through every hole in the mat, packing the strips close together so they create a dense fabric forest
- Once the entire mat is covered, fluff up all the strips so they’re standing in different directions
- Hide small treats or pieces of kibble deep in the fabric strips
- Let your cat forage through the mat to find food
Make it last longer: Start easy by placing treats near the top of the fabric strips, then hide them deeper as your cat gets better at it. Use smelly treats at first to help them understand the game. Wash the mat occasionally to keep it fresh (throw it in the washing machine).
12. The PVC Pipe Ball Maze
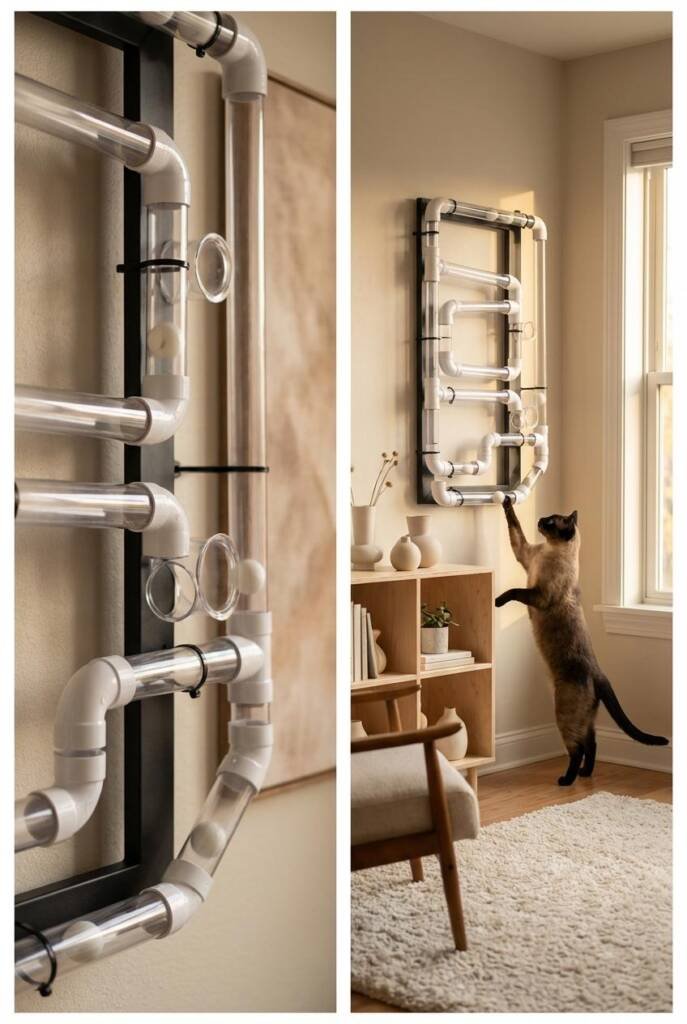
This is the ultimate “set it and forget it” toy because once you build it, it provides entertainment for months without any effort from you. Balls roll through clear pipes where cats can see them but can’t fully grab them, creating that perfect level of achievable frustration. Cats will bat balls from one end, watch them roll through curves and corners, try to intercept them at different points, and occasionally succeed in stopping one.
The transparent sections let them track the ball’s movement, which is crucial for keeping them engaged. This works for solo play—cats will spend 20-30 minutes at a time just experimenting with different strategies. It’s especially great for high-energy cats, cats who play too rough with other toys, or households with multiple cats who can play together.
Step-by-Step DIY
What you need
- 3-4 feet of clear PVC pipe (2-inch diameter works well for ping pong balls)
- PVC elbow joints (3-4 pieces)
- PVC end caps (2 pieces)
- 2-3 ping pong balls
- Zip ties or mounting tape
- Saw (to cut pipe if needed)
- Sandpaper
How to make it
- Plan your track layout—you can make it straight, L-shaped, or U-shaped depending on space. Sketch it out first
- Cut your PVC pipe into sections if needed (most hardware stores will cut it for you)
- Sand any rough edges so cats won’t get scratched
- Connect your pipe sections using elbow joints to create your track shape
- Put end caps on both ends, but before you seal them completely, drop your ping pong balls inside
- Drill or cut a few small openings (about 1.5 inches) along the track where cats can reach in and touch the balls
- Use zip ties or heavy-duty mounting tape to secure your track to a wall or baseboard at cat height (6-12 inches off the ground works well)
- Make sure it’s stable and won’t fall if batted around
Make it last longer: Mount it in high-traffic areas where your cat naturally hangs out. Create a multi-level system with pipes at different heights. Add different sized balls—some roll fast, some slow. Every few months, rearrange the track or add new sections to keep it novel.
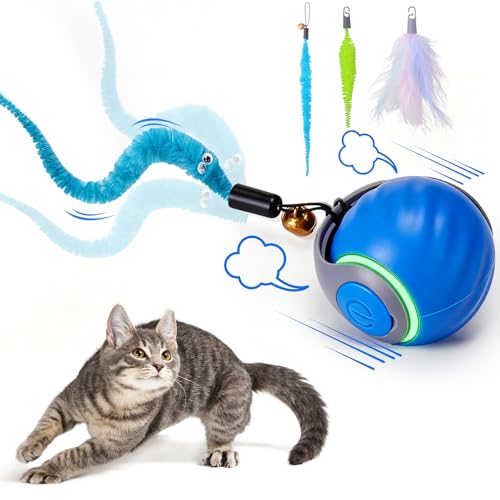
Complete Cat Entertainment Kit
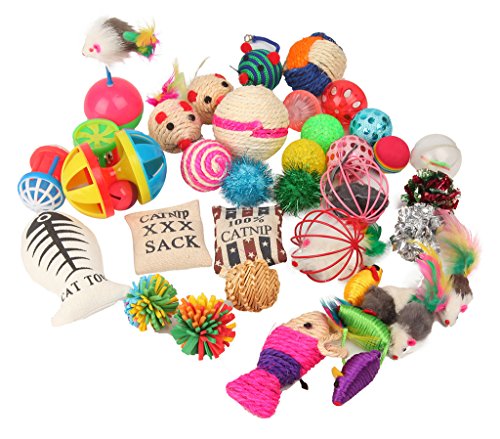
- Warm Reminder: This is a randomly assembled product bundle. We will periodically update the toys included, so the styles…
- Keep your cat busy when you are away.
- Give your cat a way to release his energy with this combo pack of entertaining toys. Featuring feathers, balls and catni…
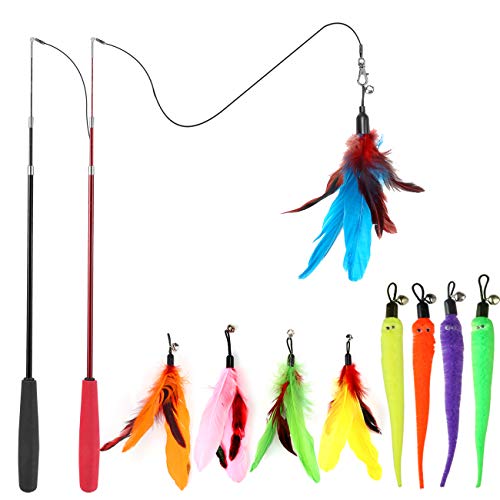
- 1. KEEP CATS VERY ENTERTAINED : Cats are crazy about chaser games! Combine string and feather into a great cat toys for …
- 2. CLASSIC PRACTICAL INTERACTIVE CAT TOY : This cat wand toy can really get your cats to do a lot exercise while enterta…
- 3. CAT TOYS INTERACTIVE FOR INDOOR CATS : Pack includes: 2PCS Cat Wand + 9PCS Feather Worms Replacements + 2PCS Extra St…
- Teething Fun: Ideal for kittens and cats alike, these chew toys are an essential addition to your kitty’s dental care. W…
- Infused with Catnip Aroma: The included catnip bag emits a soothing aroma that’s irresistible to felines, ensuring these…
- Energetic Exercise: Promote healthy exercise and self-play with our toys’ appealing textures and tassels. They’re design…
DIY Cat Toys That Actually Work
You don’t need to make all of these. Pick two or three that match your cat’s personality, puzzle feeders for food-motivated cats, hunting toys for high-energy chasers, wrestling toys for aggressive players. Rotate them weekly so nothing gets stale. The goal isn’t to overwhelm your cat with options; it’s to give them quality enrichment that makes their indoor life feel less boring.
Most of these toys either work independently or take under 20 minutes to build. You’re taking stuff you’d throw away anyway and turning it into something that keeps your cat happy, healthy, and way less likely to knock your stuff off the counter at 4am.
At Sweet Purrfections, we’re all about practical solutions that work in real life for pet lovers and home lovers alike. Because your pets aren’t Pinterest-perfect props, they’re messy, wonderful, personality-filled beings who deserve enrichment as unique as they are.