Your cat is staring at the wall again. You know the look — that restless, slightly unhinged energy that says, “I need something green to destroy.” Here’s the good news: a cat garden isn’t just a Pinterest fantasy. It’s a real, buildable project that gives your indoor cat the enrichment they’re craving while turning your home into something that actually looks intentional. And you don’t need a backyard, a greenhouse, or a degree in horticulture to pull it off.
Indoor cat gardens are the sweet spot where pet ownership meets genuine home design. They give cats safe, stimulating access to textures, scents, and flavors they’d normally only encounter outside — while giving you a living decor element that earns compliments from guests who don’t even like cats. Whether you’ve got a sunny windowsill, a bare wall, or an awkward corner that’s been collecting dust since you moved in, there’s a cat garden style here that fits.
We’ve rounded up six DIY indoor cat garden ideas that range from dead-simple to weekend-project ambitious, and every single one comes with a practical breakdown so you can actually build it — not just admire it from a browser tab. We’re talking materials, layout tips, cat-safe plant picks, and the design choices that make these gardens look like they belong in your home. Let’s get into it.
1. The Window Box Whisker Garden That Doubles as a Sun Lounge
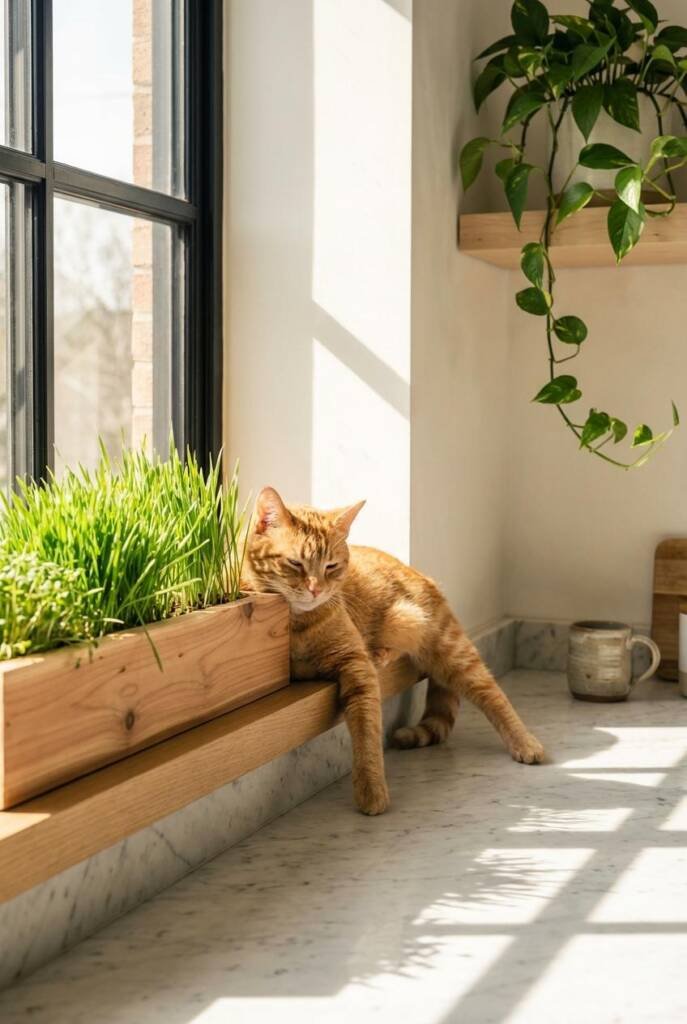
Your cat’s going to claim the windowsill anyway — might as well make it a salad bar.
A cedar window box planted with cat grass and catnip, sized to sit flush against your sunniest windowsill — that’s it, that’s the whole concept. The warm wood grain looks intentional next to your plants and books, not like pet furniture you’re tolerating. Line it with a shallow tray, fill it with greens, and suddenly your cat has a reason to post up in the sun that doesn’t involve knocking your succulents off the ledge.
Cats are grazers by instinct, and a dedicated grazing box means they leave your houseplants alone (finally). Cat grass aids digestion and gives indoor cats a sensory hit they’d otherwise miss. We like the Pet Greens Self-Grow Cat Grass Kit ($4.99 at Petco) as your starter crop — it sprouts in about 5 days and lasts a couple of weeks before you swap in a fresh one. Tuck a small catnip plant in one corner for variety. The cedar box itself acts as a wide, sturdy perch, so your cat can eat, flop, and sunbathe without you installing a separate window shelf. One build, two functions, zero ugly plastic.
How to Build a Cedar Window Box Cat Garden with Built-In Perch
- Cut and assemble the box: Build a rectangular cedar planter 24″–30″ long, 8″ deep, and 6″ wide using ¾” cedar boards (around $15 at Home Depot). Secure corners with wood glue and 1¼” brad nails.
- Waterproof the interior: Line the inside with a fitted plastic tray or pond liner to protect the wood and your windowsill from moisture.
- Plant your greens: Fill the tray with 2″ of organic potting mix, scatter cat grass seeds densely across the surface, and press a small catnip start into one end. Water lightly and place in a south-facing window.
- Secure it to the sill: Attach two L-brackets underneath to anchor the box to your windowsill so it holds your cat’s weight — most boxes this size support up to 20 lbs easily.
- Budget move: Skip the lumber and grab a ready-made cedar window box from Walmart for around $12, then just add the liner and seeds.
2. A Tiered Herb Tower Your Cat Won’t Destroy (Yes, Really)
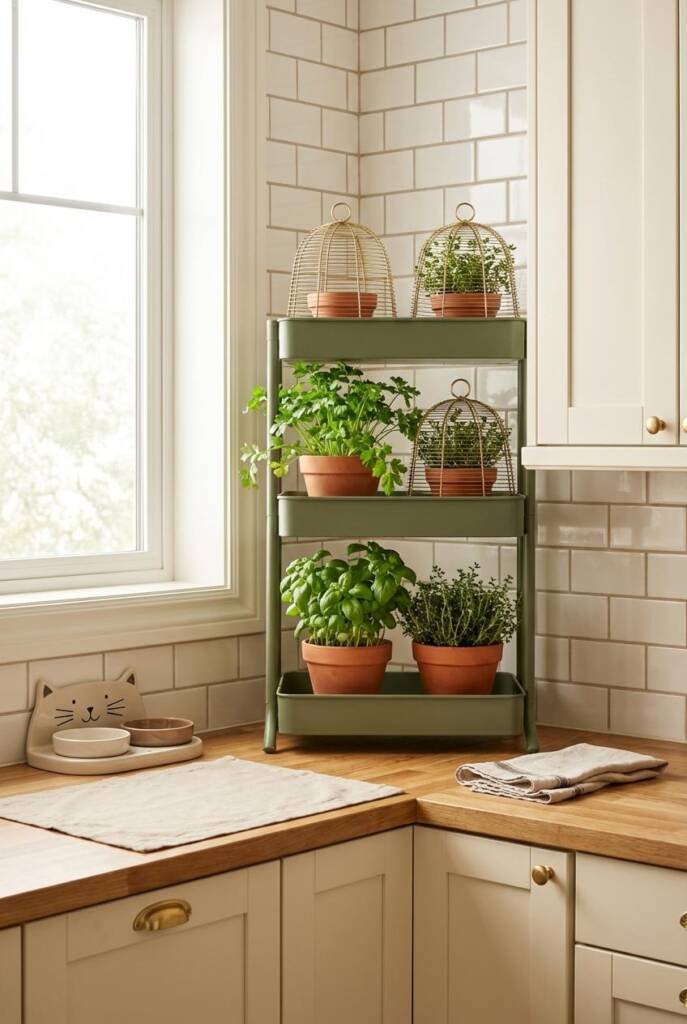
Your basil doesn’t have to die a violent, cat-induced death every two weeks.
A three-tier IKEA LANTLIV plant stand ($34.99) gives you vertical real estate for cat-safe herbs like basil, parsley, and thyme — and when you top each pot with a wire mesh cloche, you get a setup that looks like it belongs in a European kitchen garden, not a pet-proofing hack. The tiers create height variation that reads as intentional design, especially if you mix terracotta and matte white ceramic pots.
Here’s why it actually works: cats lose interest when they can’t dig or chew freely. The mesh cloches (garden centers sell them for $6–$10 each) let light and air through while blocking paws, so your herbs grow full and bushy instead of getting decapitated overnight. Mount the stand on a lazy Susan base and you can rotate the whole tower toward sunlight without rearranging your living room. The herbs stay healthy, your cat stays safe, and you stop replacing $4 basil plants every week.
How to Build a Cat-Proof Tiered Herb Garden Using IKEA LANTLIV Stands
- Set up the stand: Assemble the IKEA LANTLIV three-tier plant stand and place it on a 15-inch lazy Susan ($12 at Target) near your brightest window.
- Pot your herbs: Plant cat-safe herbs — basil, parsley, cilantro, or thyme — in 6-inch pots with drainage saucers, using organic potting mix.
- Add mesh cloches: Place wire mesh garden cloches ($6–$10 each at garden centers or Amazon) over each pot, pressing them snugly into the soil so cats can’t knock them off.
- Rotate weekly: Give the lazy Susan a quarter turn every few days so all tiers get even light, and water when the top inch of soil feels dry.
- Budget move: Skip brand-name cloches and bend 1/4-inch hardware cloth into dome shapes yourself for under $8 total.
3. The Living Wall That Turns Dead Space Into a Cat Playground
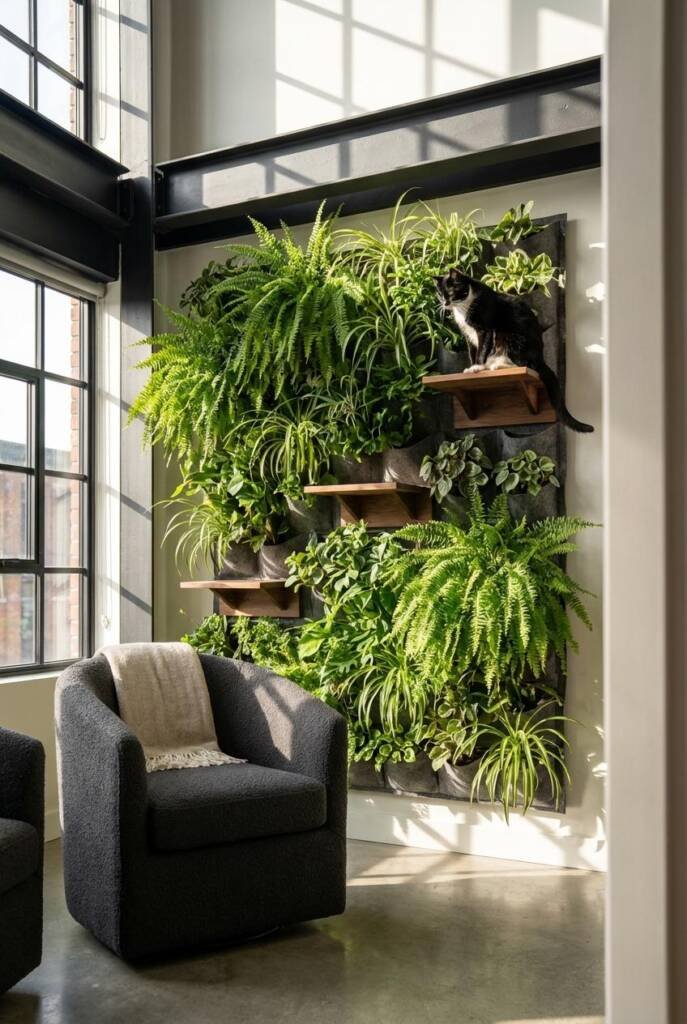
That blank wall next to the couch isn’t wasted space — it’s an unbuilt cat jungle.
A vertical felt-pocket planter mounted next to wall-mounted cat shelves creates something magical — a living climbing wall where your cat navigates between lush ferns and trailing spider plants like a tiny jungle predator. The green pockets soften all that industrial shelf hardware, and the effect is genuinely stunning: part botanical art, part cat parkour course.
Cats already love vertical space, so giving them shelves intertwined with real plants satisfies their climbing instinct while purifying your air. Pair a 36-pocket felt wall planter (around $25–$35 on Amazon) with Catastrophic Creations’ Garden Complex shelving system ($189), and you’ve got an integrated cat wall garden that looks intentional rather than cobbled together. Spider plants and Boston ferns are both non-toxic to cats and thrive in the indirect light most living rooms get.
The secret advantage here: cats who have vertical territory are measurably less stressed and less likely to scratch furniture. You’re not just decorating dead wall space — you’re solving behavior problems with aesthetics.
How to Install a Pet-Safe Living Wall with Integrated Cat Shelves
- Map your layout: Choose a wall at least 5 feet wide and sketch your shelf-and-planter arrangement, alternating Catastrophic Creations shelves with felt pocket panels so cats have a clear path upward.
- Mount shelves first: Install the cat shelves into studs using the included hardware, starting 18 inches off the ground and staggering them no more than 16 inches apart vertically so your cat can hop comfortably.
- Hang and plant the felt pockets: Secure your felt-pocket planters between the shelves with drywall anchors rated for 25+ lbs, then fill each pocket with a single Boston fern or spider plant in a 4-inch nursery pot.
- Water smart: Remove each nursery pot weekly to water over a sink — felt pockets don’t have drainage, and soggy roots will kill your plants and drip onto your cat shelves.
- Budget move: Skip Catastrophic Creations and use IKEA LACK shelves ($10 each) with L-brackets and sisal wrap for a full setup under $75.
4. A Sensory Grazing Box That Keeps Indoor Cats Stimulated for Hours
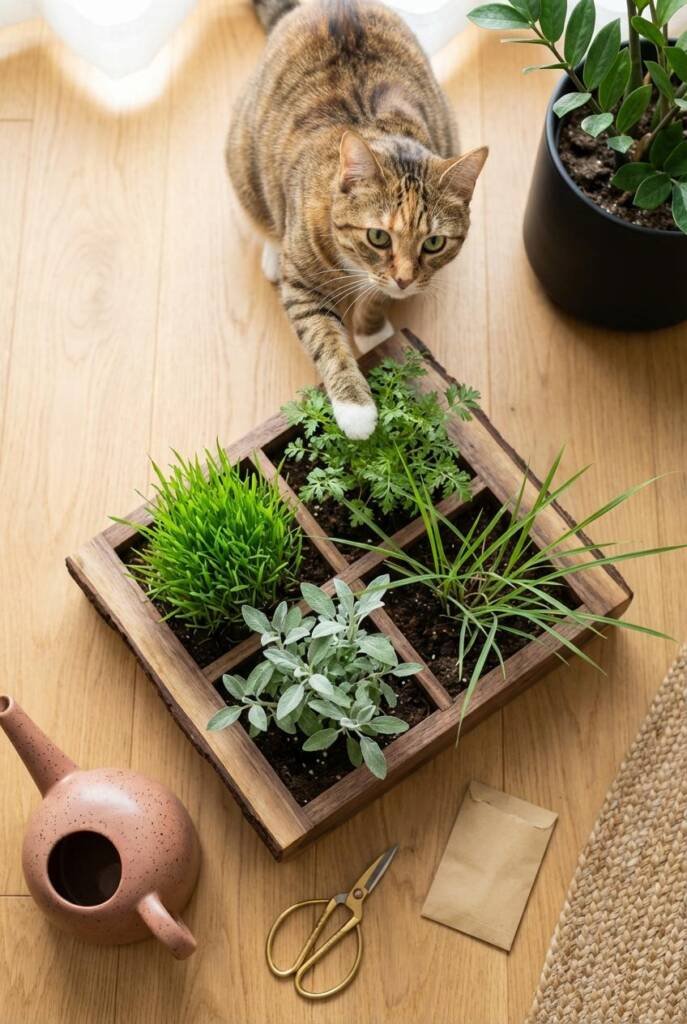
Your cat doesn’t just want to eat plants—they want to sniff, chew, bat, and roll in them, ideally all in one spot.
A shallow wooden tray planted with cat grass, silver vine, valerian, and lemongrass is basically a sensory playground your cat can destroy without consequence. The mix of textures and heights—wispy grass, bushy silver vine, feathery valerian—looks like a miniature meadow on your windowsill, and the rustic wood tray keeps it feeling intentional rather than chaotic.
Each plant targets a different sense. Cat grass satisfies the urge to chew, lemongrass adds a citrusy scent most cats find intriguing, and silver vine triggers that euphoric rolling behavior in roughly 80% of cats (including many who don’t respond to catnip). Valerian root is the sleeper hit—its smell drives cats wild while the plant itself is surprisingly pretty. Grab a pack of organic silver vine sticks from Matatabi ($8 on Amazon) to tuck into the soil as bonus chew toys while your plants establish.
The key difference between this and a regular pot of cat grass is duration. A single-plant setup gets demolished in days. A grazing box with four species gives your cat reasons to come back, investigate, and engage differently each time—genuine enrichment, not just a snack.
How to Plant a Multi-Sensory Cat Grazing Box for Under $25
- Choose Your Tray: Use a shallow wooden crate or untreated cedar planter box, roughly 18″ x 12″ x 3″ deep. IKEA’s KNAGGLIG crate ($13) works perfectly cut down to size.
- Create Drainage and Fill: Line the bottom with a layer of pebbles, then fill with organic potting mix to about half an inch below the rim.
- Plant in Zones: Divide the tray into four quadrants and sow cat grass, silver vine, valerian, and lemongrass seeds separately so each plant gets the spacing it needs.
- Grow Before You Introduce: Keep the tray in a sunny spot and water lightly for 7-10 days until sprouts are 3-4 inches tall, then let your cat have at it.
- Budget move: Buy a multi-pack seed variety bundle from True Leaf Market for around $12 instead of sourcing each species separately.
5. The Enclosed Catio Greenhouse You Can Build in a Weekend
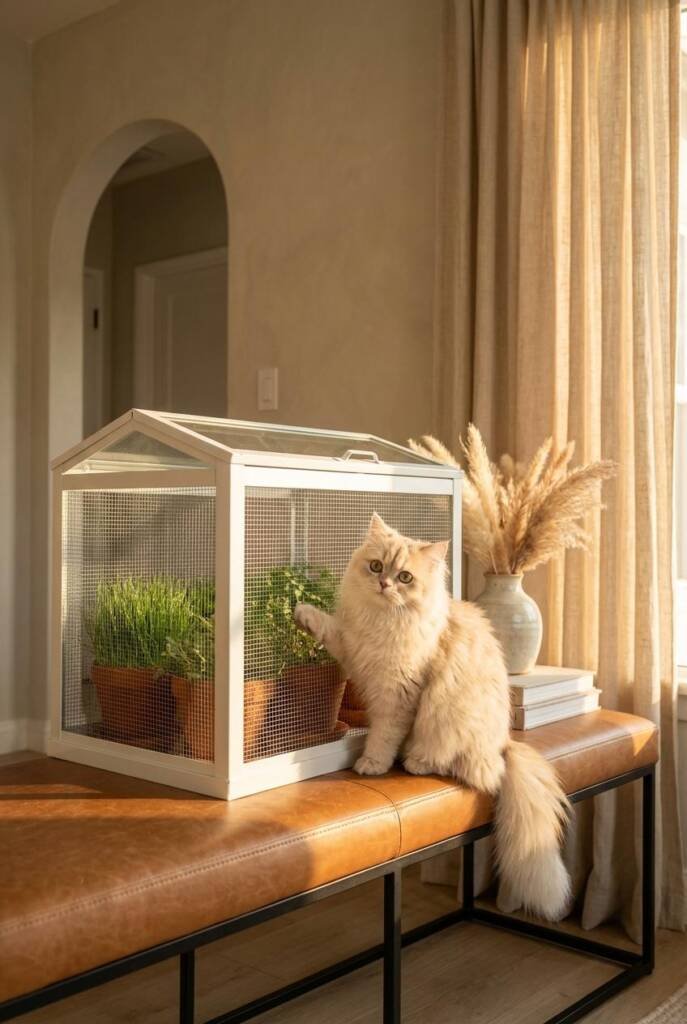
Your cat gets a personal greenhouse — they just can’t ransack it.
The IKEA SOCKER greenhouse ($24.99) is already a gorgeous little glass-and-steel structure — but with a few modifications, it becomes an enclosed indoor catio garden where your cat can nap surrounded by living plants without devouring them in ten minutes flat. Swap out some glass panels for hardware cloth, add a hinged access door, and suddenly you’ve got a miniature greenhouse terrarium that lets your cat stick their face in, sniff the goods, and nibble through the mesh — while the plants actually survive long enough to grow back.
The magic here is controlled access. Cats get the sensory enrichment of fresh wheatgrass and catnip without bulldozing the entire garden in one sitting. Plant a mix of Organic Pet Grass seeds from The Cat Ladies ($12.99 on Amazon) alongside catnip and lemon balm — all safe, all aromatic, all designed to keep your cat engaged without a trip to the vet. The mesh lets scents waft through while keeping paws from uprooting everything. If you’ve got a sunny windowsill or a sturdy side table, this setup takes up about 17″ × 9″ of space and looks like something out of a plant influencer’s feed.
How to Convert an IKEA SOCKER Greenhouse into an Indoor Catio Garden
- Remove Alternate Glass Panels: Pop out 2-3 side glass panels from the SOCKER frame and cut 1/2-inch galvanized hardware cloth ($8 at Home Depot) to fit each opening, securing with small cable ties or E6000 adhesive.
- Create the Planting Base: Line the greenhouse tray with a plastic liner, add 2 inches of organic potting soil, and plant wheatgrass, catnip, and lemon balm seeds about 1/4 inch deep.
- Set Up and Position: Place the assembled greenhouse on a sunny windowsill that gets at least 4-6 hours of indirect light and mist the soil daily until sprouts appear in 5-7 days.
- Introduce Your Cat: Once plants reach 3-4 inches tall, let your cat investigate — they’ll be able to sniff and nibble small bits through the mesh without destroying the roots.
- Budget move: The entire build runs under $50 if you already own basic tools, since the SOCKER frame and hardware cloth are your only real expenses.
6. A Hanging Cat Garden That Keeps Plants Safe (and Looks Incredible)
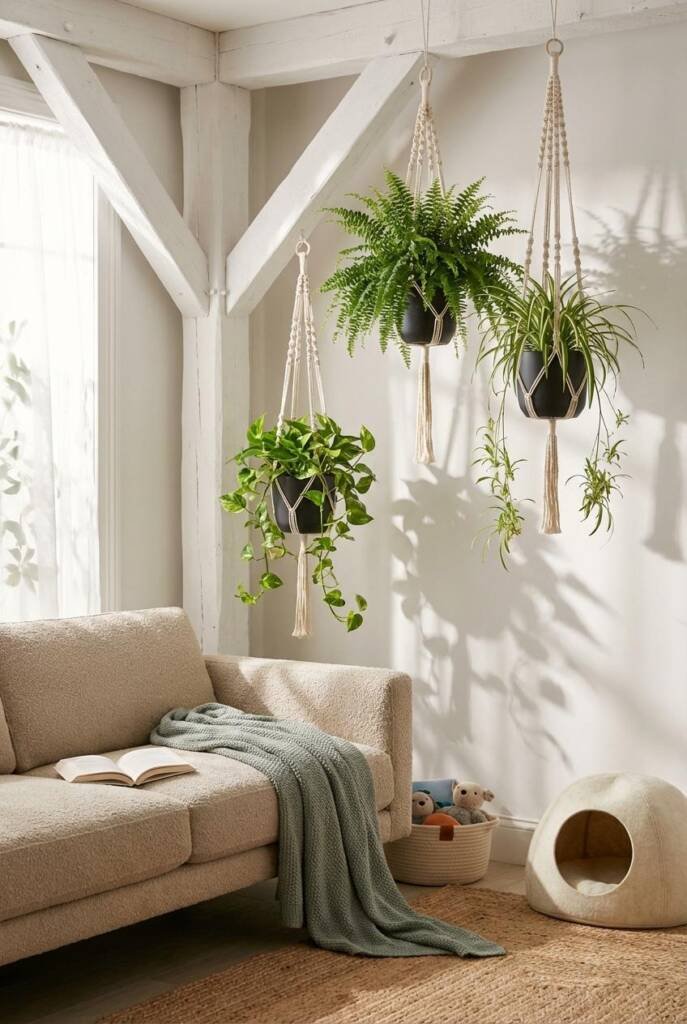
Your cat can’t destroy what your cat can’t reach — so take the garden vertical.
A hanging cat garden turns your ceiling into a living canopy of trailing greenery that’s completely out of paw’s reach. Spider plants cascading from macramé holders, Boston ferns spilling over ceramic pots, and string of hearts draping down from ceiling hooks — it’s the kind of setup that makes people stop mid-sentence when they walk into your room. The layered, overhead effect adds dimension no shelf garden can match.
This is the ultimate cat-proof setup because there’s nothing to knock over, dig in, or chew on (assuming you hang plants high enough — 5 feet minimum from any launching surface like a cat tree or bookshelf). Mkono’s macramé plant hangers ($8–$14 on Amazon) hold up to 20 lbs and come in sets, so you can cluster three or four at different heights for that jungle-canopy look. West Elm’s brass ceiling hooks ($12 each) add a polished finishing touch if you want to elevate beyond the boho vibe. Stick exclusively to ASPCA-verified non-toxic trailing plants, and you’ve got a lush indoor cat garden that’s as safe as it is stunning.
How to Design a Hanging Indoor Cat Garden Using Ceiling Planters
- Map your ceiling layout: Choose a corner or window-adjacent area and mark 3–4 hook placements spaced 12–18 inches apart. Stagger heights by varying rope lengths for a layered canopy effect.
- Install ceiling hooks properly: Use toggle bolts rated for 50+ lbs if you’re not drilling into a joist — standard drywall anchors will fail with a wet Boston fern. West Elm’s brass hooks or basic swag hooks from Home Depot ($3) both work.
- Pick your trailing plants: Spider plants, Boston ferns, and parlor palms are all ASPCA-approved and thrive in indirect light. Choose plants with different leaf textures to keep the visual interesting.
- Hang and adjust for cat safety: Position every planter at least 5 feet above the nearest cat-accessible surface. Trim any trailing vines before they dangle low enough to become a toy — a monthly check keeps things safe.
- Budget move: Three Mkono macramé hangers ($24 total) plus spider plant starts from a local nursery ($3–$5 each) gets the whole canopy going for under $40.
Cat Garden That Welcome Pets
Six projects, six different ways to bring the outdoors in without sacrificing your style or your cat’s safety. Whether you went all-in on the enclosed catio greenhouse or started small with a sensory grazing box on the kitchen floor, the point is the same: your indoor cat deserves more than four walls and a food bowl, and your home deserves more than plastic grass in a dollar-store pot. A well-designed cat garden delivers on both fronts — real enrichment for your cat, real beauty for your space.
The best part? These projects grow with you. Start with one, see how your cat responds, and expand from there. Mix a window box with a hanging garden. Pair the living wall with a tiered herb tower. Once you start thinking of your cat garden as a design feature instead of a compromise, the whole energy of your home shifts.
Here at Sweet Purrfections, we create content at the intersection of cool home decor and real life with pets. Because we believe your home should look like it belongs in a design magazine AND work for the furry family members who actually run it.