That old cooler gathering dust in your garage? The wooden crate from last month’s farmer’s market haul? What if they could become lifesaving shelters for the feral cats in your neighborhood, without costing you a dime?
Upcycling isn’t just about being eco-friendly or budget-conscious. It’s about seeing potential where others see trash, and transforming everyday discards into safe havens that outdoor cats desperately need. These genius ideas prove you don’t need a big budget or expert carpentry skills to make a real difference, just a little creativity and an afternoon free.
Take a look at these 10 surprising ways to help feral cats>>
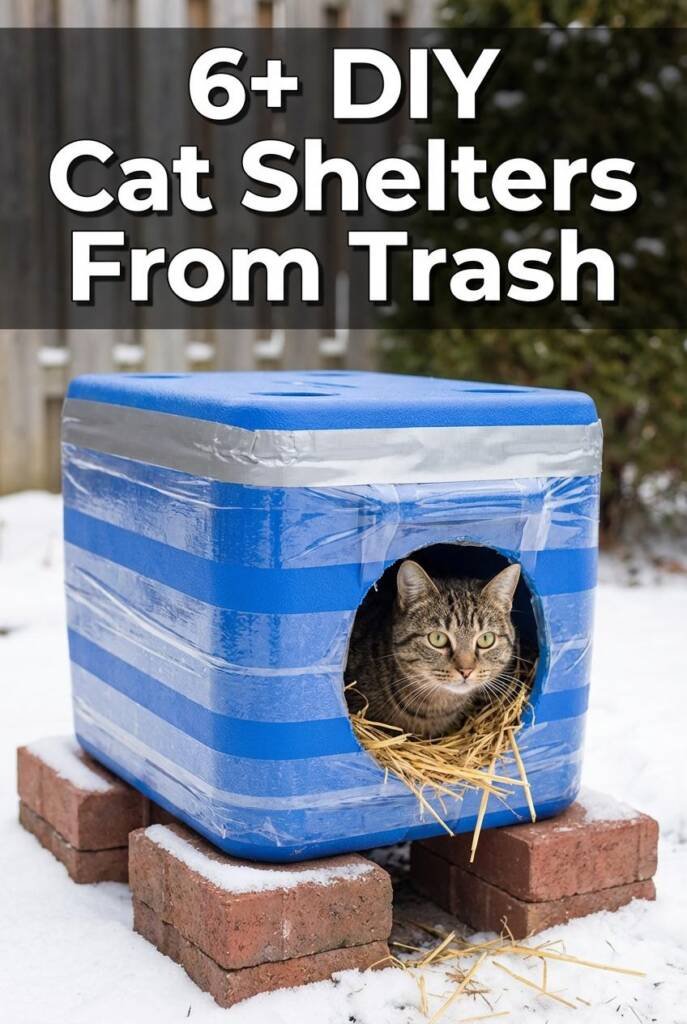
1. Turn a Styrofoam Cooler into an Insulated Winter Retreat
Those cheap styrofoam coolers from summer picnics are goldmines for feral cat care. Their thick walls provide natural insulation that traps body heat beautifully, and they’re completely waterproof when sealed properly.
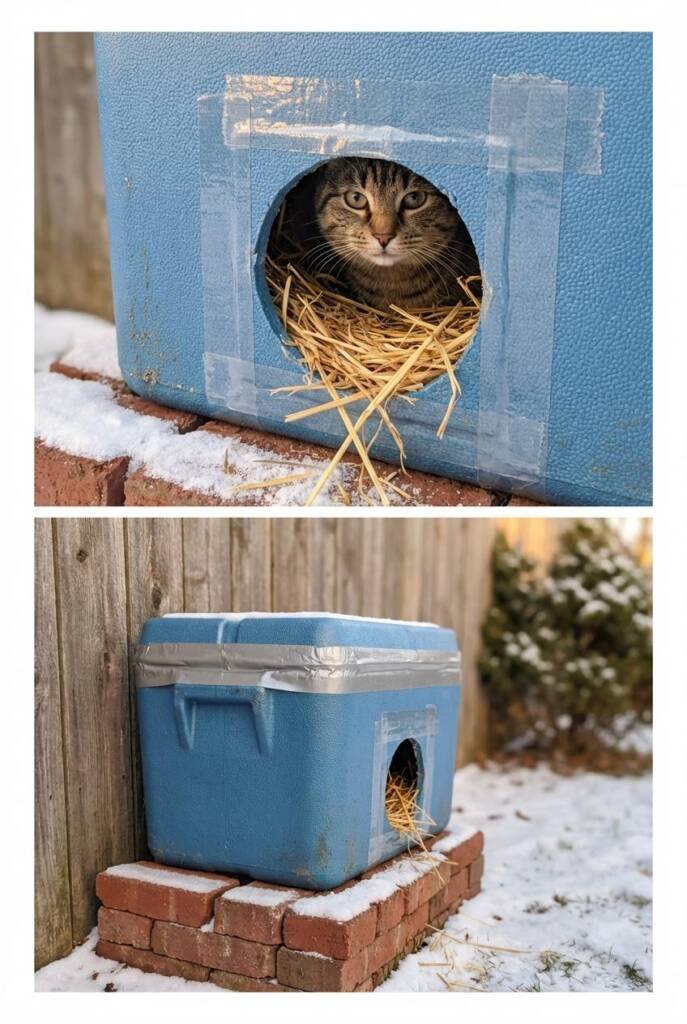
Cut a 6-inch entrance hole on one of the short sides, about 3-4 inches from the bottom. This keeps cold air from sinking in while letting cats slip through easily. Flip the lid upside down and duct tape it securely to create a sealed roof—this prevents rain from seeping through the seams.
Making It Last All Season
- Wrap the entire exterior in weatherproof tape or a contractor-grade garbage bag to prevent UV breakdown
- Elevate it on bricks or pavers so ground moisture doesn’t wick up through the bottom
- Nestle it against a building wall or under a deck to block wind from multiple angles
- Fill with 6-8 inches of straw (never hay or fabric) for cats to burrow into
- Check monthly and replace straw if it becomes matted or damp
The beauty of styrofoam is that even if it only lasts one winter season, you’ve literally rescued materials headed for a landfill and given outdoor cats a warm refuge during the coldest months. One person’s trash becomes a cat’s survival shelter.
2. Transform Plastic Storage Bins into Multi-Cat Shelters

That cracked 18-gallon storage tote you were about to toss? It’s the perfect size for a feral cat shelter. Unlike flimsy cardboard, hard plastic is weatherproof, rodent-proof, and can house 2-3 cats comfortably when temperatures really plummet.
Drill or cut a 6-inch circular entrance on one short side, positioned 5-6 inches from the bottom. The higher placement prevents snow and rain splash from entering while still being easily accessible. Snap the lid on firmly, then reinforce all seams with waterproof silicone caulk or all-weather tape.
Upgrade Ideas That Make the Difference
- Add foam board insulation cut to fit the interior walls—this turns a basic shelter into a legitimately warm refuge
- Cut a second small hole on the opposite end as an escape route (cats feel safer with two exits)
- Paint the exterior dark green, brown, or gray so it blends into outdoor surroundings and attracts less attention
- Use command hooks on the inside corners to hang a small solar-powered thermometer—you’ll actually know if your shelter is staying warm enough
- Stack two bins together with the second one inverted as a vestibule entrance to create a wind tunnel barrier
During a polar vortex, these upgraded bin shelters can maintain an internal temperature 20-30 degrees warmer than outside. That difference literally saves lives.
3. Repurpose Wooden Wine Crates as Rustic Feeding Stations
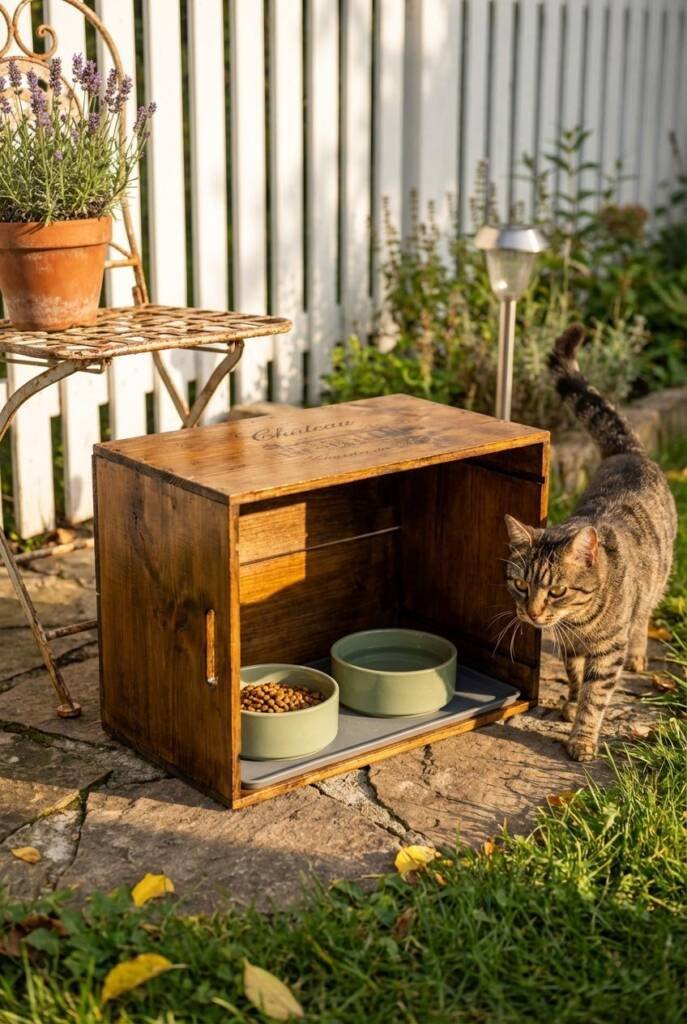
Those sturdy wooden wine crates with slatted sides make unexpectedly perfect feeding stations. The natural gaps provide drainage if rain blows in, the raised bottom keeps food off cold ground, and the rustic look actually makes your yard more charming instead of cluttered.
Flip the crate upside down and cut or remove one of the slatted sides to create an entrance. Place ceramic or stainless steel bowls inside—they’re heavy enough not to tip and easy to clean. The crate’s wooden roof provides just enough shelter to keep food dry during light rain.
Smart Setup Tips
- Treat the wood with pet-safe waterproof sealant to extend its life by several seasons
- Attach adhesive-backed grip liner to the bottom interior so bowls don’t slide around
- Drill small drainage holes in the floor corners to prevent water pooling if moisture does get in
- Position against a fence or wall with the entrance facing away from prevailing winds
- Add a solar-powered motion light nearby so cats feel safe eating at dawn and dusk
Wine crates often come free from liquor stores or wine shops—just ask the staff. Many are happy to let you take them rather than breaking them down for recycling. One trip can supply your entire neighborhood’s feeding station needs.
4. Convert Old Dressers or Nightstands into Weatherproof Shelters
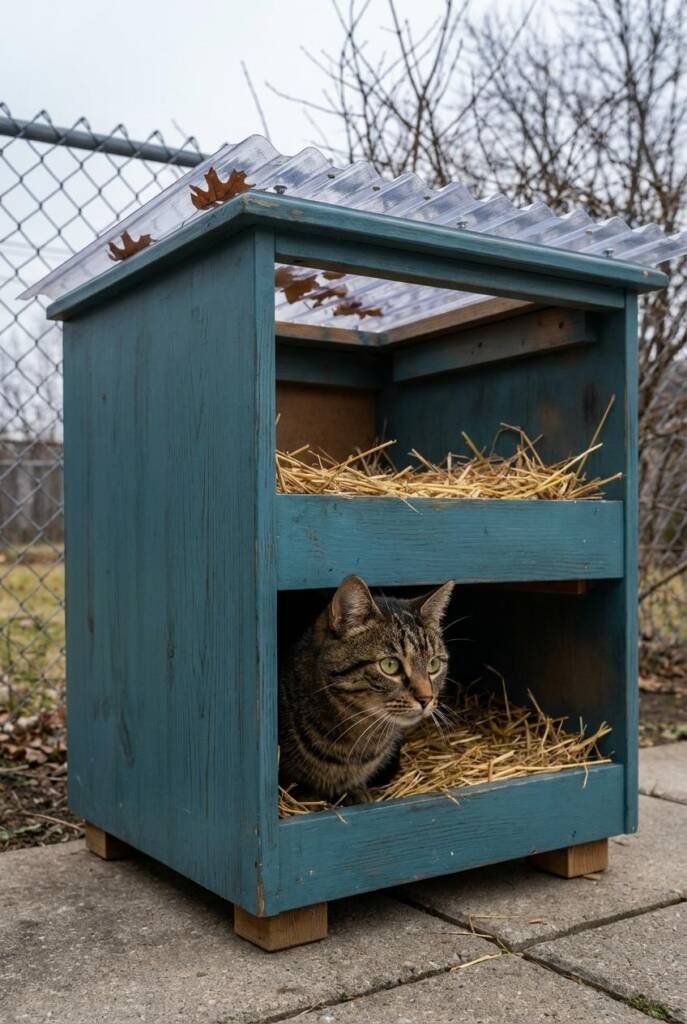
Before you haul that old nightstand to the curb, consider its second life as a surprisingly sophisticated cat shelter. Wooden furniture with enclosed cabinets already has the structure, insulation, and multiple “rooms” that make perfect feral cat colonies.
Remove any drawers and hardware, then flip the piece on its back so the open drawer cavity becomes a horizontal entrance. Cover the top and exposed back with exterior plywood or corrugated plastic roofing sheets to weatherproof it completely. The interior shelves or dividers create separate sleeping areas that multiple cats can share without feeling cramped.
Furniture-to-Shelter Conversion Steps
- Strip off any veneer that’s peeling to prevent cats from ingesting wood chips
- Sand rough edges around the entrance opening to prevent splinters
- Apply two coats of exterior paint or waterproof wood stain to all surfaces
- Caulk every seam and corner with outdoor-grade sealant before painting
- Add small wooden blocks as “feet” to elevate it 2-3 inches off the ground
- Line each compartment with straw, leaving the entrance area clear for easy access
The divided interior means dominant cats can claim upper areas while timid cats hide below—reducing tension in managed colonies. Plus, these furniture-based shelters look intentional in your yard, not makeshift, which often reduces neighbor complaints.
5. Use Cardboard Boxes Inside Larger Containers for Double-Insulation Magic
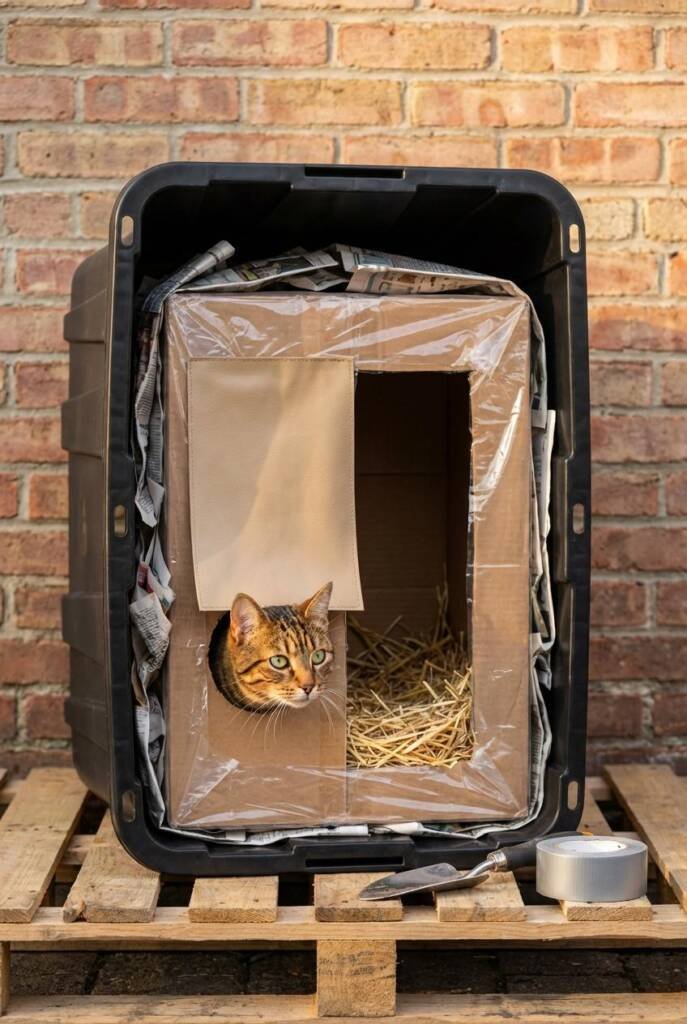
Here’s an upcycling hack that costs absolutely nothing: nest a cardboard box inside a larger plastic bin or wooden crate to create a dual-layer insulation system that’s shockingly effective. The air gap between the two layers acts as a thermal barrier, keeping cold out and body heat in.
Find a sturdy cardboard box (appliance boxes work great) that fits inside your outer container with 2-3 inches of space on all sides. Cut matching entrance holes in both the outer container and inner box, making sure they align perfectly. Fill the gap between them with crumpled newspaper, packing peanuts, or even dried leaves—all free insulation materials.
Maximizing the Cardboard Method
- Wrap the cardboard box in a contractor bag before inserting it to protect against moisture seeping through
- Use duct tape to secure the bag’s opening around the entrance hole so it doesn’t shift
- Replace the cardboard insert mid-winter if it starts to sag or deteriorate—the outer container protects it, but it’s not permanent
- Add a vinyl door flap over the entrance (cut from an old placemat or folder) to trap heat even better
- Keep the entire shelter under a covered area like a porch or overhang for maximum cardboard longevity
What makes this brilliant is the flexibility—you can swap out the cardboard liner seasonally while keeping the same outer container. Use thick insulation in winter, then remove it in summer for better airflow. It’s adaptable shelter design at its most resourceful.
6. Transform Wooden Pallets into Elevated Feeding and Shelter Platforms
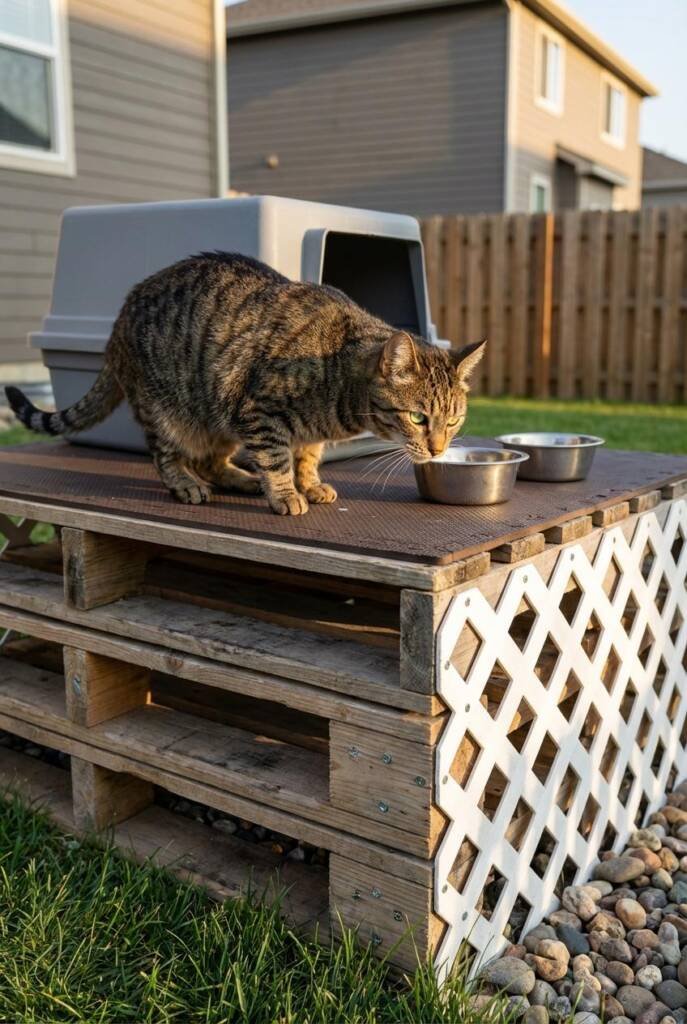
Free wooden pallets are everywhere—behind stores, at construction sites, listed on Craigslist. Two or three pallets stacked and secured create an elevated platform that keeps shelters and feeding stations off cold, wet ground while providing natural drainage and ventilation underneath.
Stack pallets to your desired height (12-18 inches works well), then secure them together with outdoor wood screws or zip ties through the slats. Place your shelter or feeding station on top, and suddenly you have a professional-looking setup that prevents ground moisture, deters some predators, and makes cats feel safer with an elevated vantage point.
Pallet Platform Design Ideas
- Sand any rough or splintered areas so cats don’t injure their paws
- Add plywood sheeting on top for a smooth, solid surface that’s easier to clean
- Use outdoor carpet remnants or rubber stall mats on the platform for non-slip texture and extra insulation
- Paint or stain the pallets to match your home’s exterior so the setup looks intentional
- Angle one end slightly higher by adding extra support blocks underneath—this creates natural water runoff
- Tuck lattice panels or evergreen branches around the sides to create a semi-enclosed “porch” feeling
The industrial look of pallets actually works in your favor—neighbors often assume it’s temporary storage rather than permanent cat infrastructure. And if you ever need to move or adjust your setup, pallets break down and reconfigure easily.
7. Repurpose Plastic Laundry Baskets as Quick-Assembly Shelters
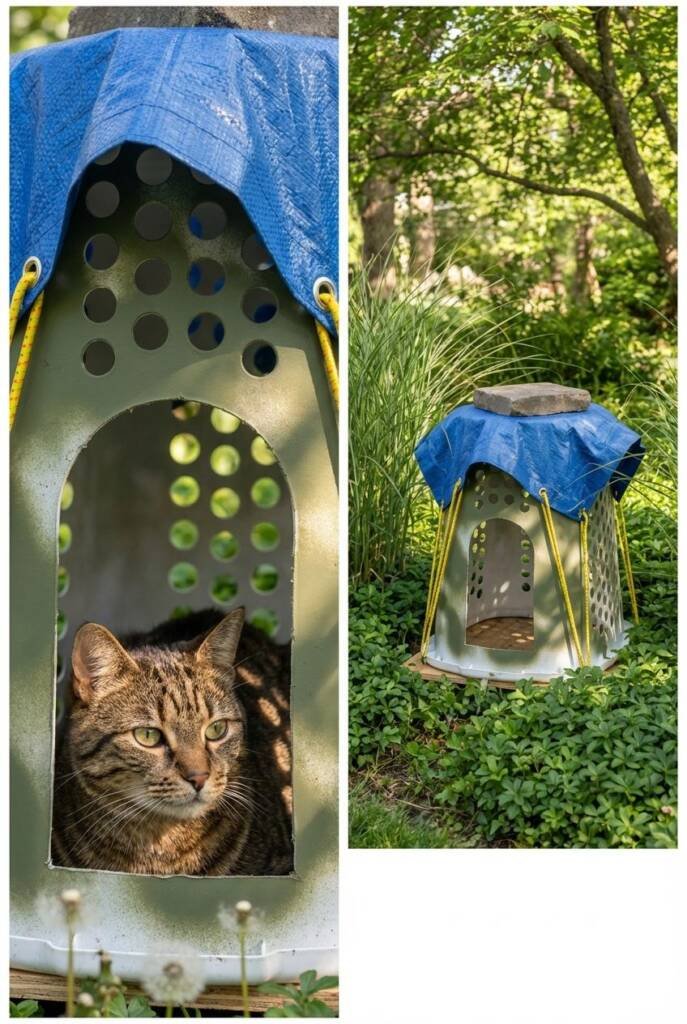
Those cracked laundry baskets with the holes in the sides? They’re actually perfect for creating ventilated summer shelters or rain-protected feeding domes. The perforated design allows airflow while the curved shape sheds water naturally.
Turn a large laundry basket upside down and cut a cat-sized entrance arch on one side. For a feeding station, simply place bowls underneath and let the basket act as a protective dome. For a shelter, nest it inside a larger waterproof container or place it on a plywood base, then cover the entire thing with a tarp or waterproof fabric, securing it with bungee cords.
Laundry Basket Hacks for Cat Care
- Use two baskets back-to-back to create a tunnel entrance that blocks wind and rain while giving cats an escape route
- Weave weatherproof fabric strips through the holes for added privacy and wind protection without losing all ventilation
- Spray paint them green or brown to camouflage them in garden settings
- Secure a weighted board or paver on top (over the tarp) so wind doesn’t flip them over
- Line the interior with straw in winter or leave it empty in summer for cooling airflow
These work especially well as transitional shelters during spring and fall when cats need rain protection more than heavy insulation. They’re also light enough to move easily if you need to relocate feeding areas due to neighbor concerns or wildlife traffic.
Shopping List to Make These Ideas Work
- Straw Bedding (5 lb bag): Not hay—actual wheat or oat straw with hollow stalks that trap warm air. One bag fills 3-4 shelters and stays dry even when compressed. Available at farm supply stores or pet retailers for $8-15.
- All-Weather Silicone Sealant: Bridges the gap between “working for now” and “lasting all season.” Seals every seam, crack, and entrance edge to make any upcycled container truly weatherproof. Choose clear or paintable formulas for a cleaner finish.
- Exterior-Grade Duct Tape or Weatherproof Tape: Reinforces weak points, secures tarps, and patches unexpected cracks that develop over time. The outdoor-rated versions withstand UV exposure and temperature extremes far better than regular duct tape.
- Foam Board Insulation Sheets: Lightweight, cuttable, and dramatically improves heat retention in any shelter design. A single 4×8 sheet costs $10-15 and provides enough insulation for multiple projects. Look for the pink or blue rigid foam at hardware stores.
- Vinyl or Rubber Door Flaps: Cut from old placemats, rubber mats, or flexible cutting boards to create entrance flaps that block wind while letting cats push through easily. This simple addition can raise interior shelter temperature by 10-15 degrees.
Why Upcycling Works for Cats and Communities
Every piece you rescue from the trash becomes a statement: that outdoor cats matter, that solutions don’t require wealth, and that creativity beats consumption every time. These projects prove you can build an entire neighborhood care system from materials others overlook.
When you see results—a cat curled contentedly in your cooler shelter during a snowstorm, or a timid feral finally trusting your pallet feeding station—you realize these aren’t just crafts. They’re lifelines built from things people throw away, transformed by people who refuse to look away.
At Sweet Purrfections, we believe the best ideas for pet lovers and home lovers come from seeing possibility everywhere. Whether you’re upcycling furniture into cat shelters or finding new ways to care for the animals in your community, we’re here to inspire your next creative solution—one rescued item at a time.