This post contains affiliate links and I will be compensated if you make a purchase after clicking on my links.
Why Build a DIY Cat Wheel: Benefits and Savings
We all know that an active cat is a healthy cat, but finding the right gadget to spur their inner hunter can be a bit of a ‘cat-and-mouse’ game.
Enter the cat wheel – a fantastic invention that lets your furry friend sprint, play, and stay in top shape, all within the comfort of your home.
But here’s the catch: sometimes these wheels come with a price tag that might make even the most lavish of cats blink twice. Not to worry! For those of us who love a good project (and love keeping our wallets happy), we’re diving into the world of DIY cat wheels.
And for those who prefer a ready-made solution without breaking the bank, we’ve got you covered with the best cheap alternatives. So, whether you’re a hands-on builder or a savvy shopper, get ready to roll into the realm of affordable cat exercise wheels!
Building Your Cat Wheel: Basics and How-To Guide
Fundamentals of DIY Cat Wheels
Welcome to the DIY zone, where your creativity meets your cat’s need for speed! Building a DIY cat wheel isn’t just a fun weekend project – it’s an invitation to tailor-make a slice of kitty paradise.
Essential Components for DIY Wheels
At its heart, a DIY cat wheel is a simple concept – a large, sturdy wheel that your cat can run inside, similar to a hamster wheel (but way cooler). You’ll need some basic materials: a circular frame, a stable base, and a non-slip running surface. The beauty of DIY is that you can recycle materials, like using an old bicycle wheel for the frame, making this a paw-some eco-friendly project.
Advantages of Custom Cat Wheels
Apart from the unbeatable price (hello, savings!), crafting a cat wheel yourself means you can size and decorate it to suit your cat’s personality. Does your feline fancy a jungle theme, or maybe something more minimalist? It’s all up to you. Plus, the satisfaction of watching your kitty zoom around in a wheel you made? Priceless!
In the next part, we’ll walk you through the step-by-step process of building your very own cat exercise wheel – get ready to unleash your inner craftsperson.
Rolling Up Your Sleeves: A Step-by-Step Guide to Building a DIY Cat Wheel
Ready to get your paws dirty? Here’s a step-by-step guide to help you build a cat wheel that’s sure to get your kitty’s tail wagging. And for the tech enthusiasts, we’ve included a twist – how about adding a step counter or a playtime tracker to keep tabs on your cat’s fitness?
Required Materials and Tools
- A large circular frame or ring (This could be made from a durable material like MDF or a strong plastic, with a diameter suitable for the size of the cat wheel you’re building). At least 40 inches diameter
- Hardwood plywood for the wheel surface (12mm thickness, cut into 40 pieces approx. 300x80x12mm). The number of plywood pieces will depend on the circular frame you have.
- Screws, brackets, and a central axle
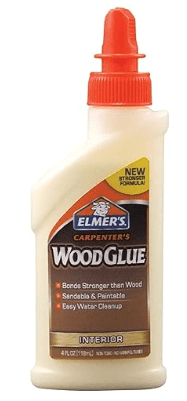
- Good Quality wood glue for bonding
- Basic tools: saw (preferably a jig saw for precision), screwdriver, drill
- Optional: Veneer sheet for wrapping the wheel for smoother rotation
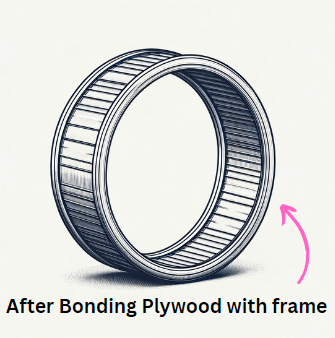
Step 1: Building the Wheel Frame
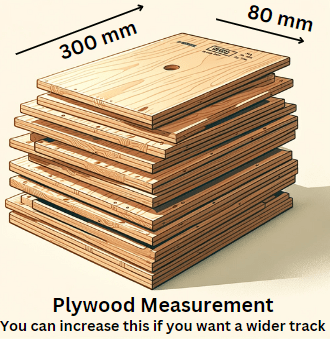
- Preparing the Pieces: First, ensure that all 40 plywood pieces (300x80x12mm) are cut precisely and are of uniform size. This uniformity is key for a balanced and smooth-running wheel.
- Applying High-Quality Wood Glue: Before attaching each piece to the circular frame, apply a layer of high-quality wood glue on the edge that will be in contact with the frame. This glue provides the primary adhesion and ensures that the pieces stay in place.
- Placing the Plywood Pieces: Carefully place each plywood piece onto the circular frame, pressing firmly to ensure good contact with the glue. It’s important to align them evenly around the frame to maintain balance in the wheel.
- Screwing for Extra Strength: After the glue, reinforce each piece with screws. Drill pilot holes first to prevent the wood from splitting. Then, using a screwdriver or a drill, insert screws through the plywood into the frame. This step is crucial as it adds significant strength and durability to the wheel.
- Ensuring Even Spacing and Alignment: As you attach each piece, make sure they are evenly spaced and properly aligned. Any misalignment could lead to an uneven running surface, which can be unsafe for your cat.
- Letting the Glue Dry: After all the pieces are attached, let the wheel sit for the glue to dry completely, as per the glue manufacturer’s instructions. This waiting period is essential for the glue to set and provide a strong bond.
- Final Inspection: Once the glue is dry, inspect the wheel for any loose pieces or protruding screws. It should feel stable and balanced with no wobbly parts.
Step 2: Designing the Running Track
Now that you have the frame and plywood pieces securely attached, it’s time to focus on creating a running surface that’s both safe and inviting for your feline friend. Here’s how you can do it
Materials Needed:
- Sandpaper or a sanding block
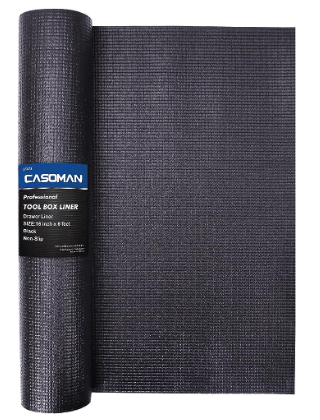
- Non-slip mat or thin carpet (optional, depending on your cat’s preference)
- High-quality wood glue and screws (for attaching the non-slip surface)
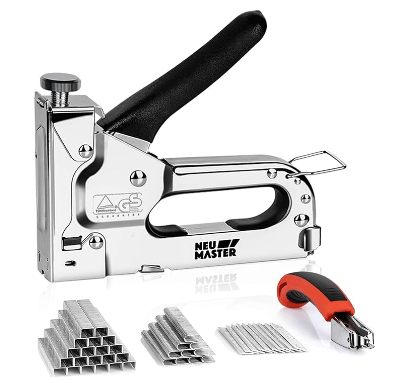
- Staple gun (if using carpet)
Create the Running Surface
- Smoothing the Plywood: Before adding any covering, it’s crucial to smooth out the plywood surface. Use sandpaper or a sanding block to sand down any rough edges or splinters on the plywood pieces. This step is essential for your cat’s safety and comfort.
- Measuring and Cutting the Non-Slip Surface: If you’re using a non-slip mat or carpet, measure and cut it to fit the circumference and width of the wheel. Ensure it covers the entire running area without any gaps.
- Attaching the Non-Slip Surface:
- Using Wood Glue: If you’re using a non-slip mat, spread a thin, even layer of wood glue over the plywood surface. Carefully lay the mat on top, pressing it down firmly to ensure good adhesion. Wipe away any excess glue that oozes out.
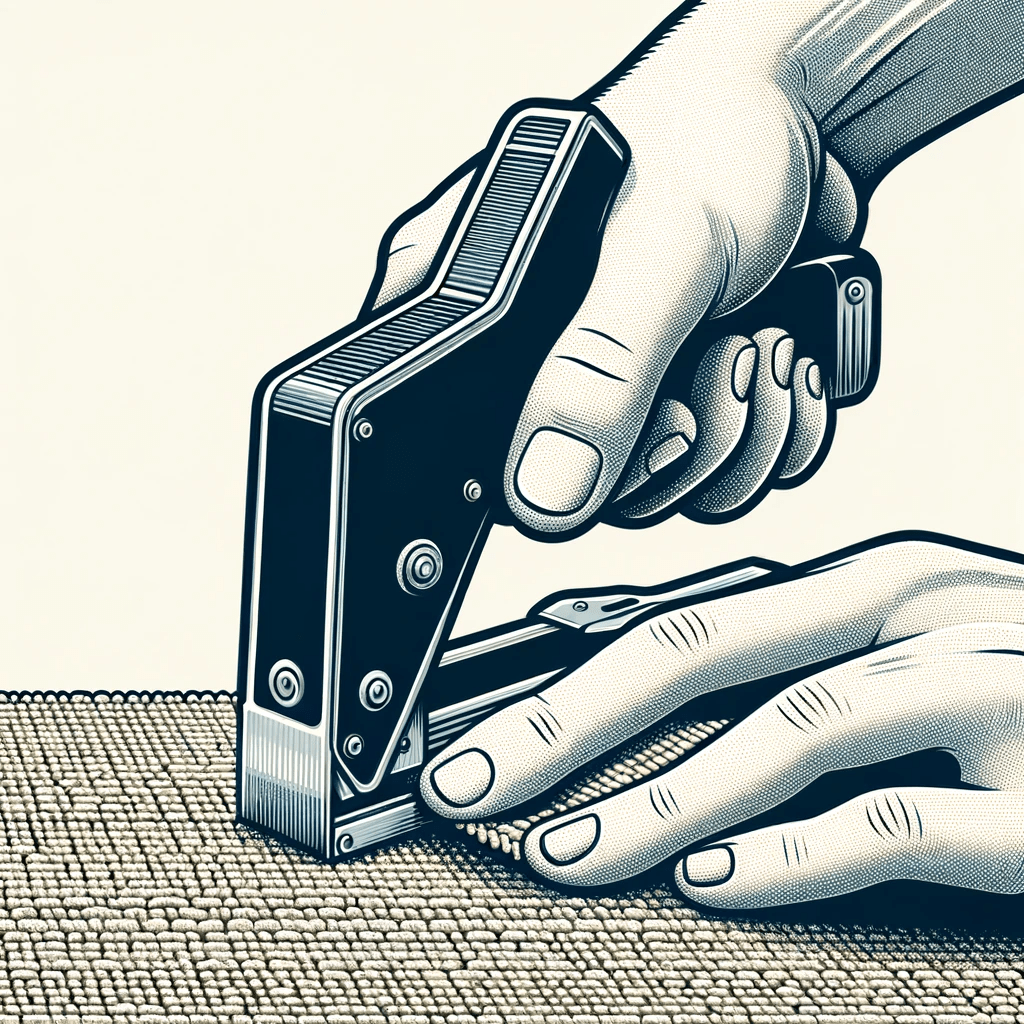
- Using a Staple Gun for Carpet: If you opt for carpet, a staple gun will be more effective. Pull the carpet taut over the surface and staple it along the edges at regular intervals. Make sure the staples are well-secured and do not protrude.
- Ensuring a Smooth Finish: Once the non-slip surface is attached, go over it to ensure there are no loose ends or rough patches. If you used carpet, check that all staples are flush with the material to prevent any risk of injury to your cat.
- Final Inspection and Adjustments: Give the wheel a spin to check for any bumps or unevenness in the running surface. Make any necessary adjustments to ensure a smooth rotation.
Step 3: Assembling the Support Base
With the wheel and running surface ready, the next critical step is to build a strong and stable support base. This base will hold the wheel in place and ensure smooth rotation. Here’s how you can craft the support part of your DIY cat wheel.
Materials Needed:
- Hardwood plywood (12mm thickness)
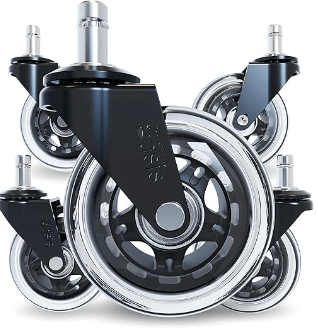
- High-quality urethane wheels (to support the weight of the catwheel)
- Side wheels (to prevent friction and ensure smooth horizontal movement)
- Screws and brackets for assembling the base
- Tools: Drill, screwdriver, saw
Steps to Construct the Support Base
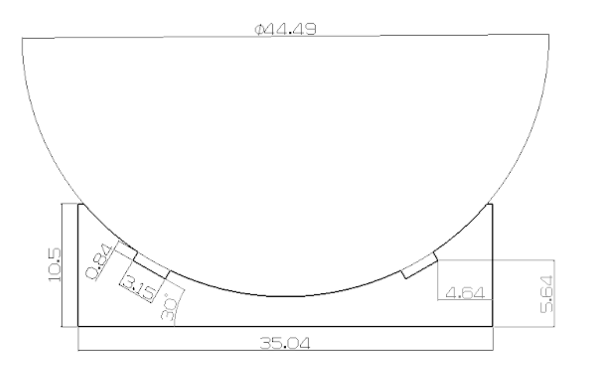
Photo Courtesy of Cat Noli
- Cutting the Wood for the Base: Measure and cut the hardwood plywood to the required dimensions for the base. Ensure that the size and shape of the base provide adequate stability and balance for the wheel. A base of approximately 100cm in length and 60cm in width should suffice. These dimensions provide enough surface area to support the wheel and prevent tipping.
- Assembling the Support Structure:
- Arrange the cut pieces of plywood to form the support structure. This structure should be designed to hold the cat wheel at an appropriate height and angle (See Video).
- Use screws and brackets to assemble the pieces. Ensure that all joints are tight and secure, as this base needs to withstand the motion and weight of the cat wheel.
- Attaching the Urethane Wheels:
- Position and fix the urethane wheels onto the base. These wheels will support the cat wheel and facilitate smooth rotation.
- Ensure that the urethane wheels are of high quality with good bearings for durability and effortless movement.
- Adding Side Wheels for Stability:
- Attach small side wheels to the sides of the base. These wheels play a crucial role in preventing the cat wheel from rubbing against the base during horizontal movement.
- Adjust the placement of these side wheels to ensure they provide adequate support and allow for unrestricted rotation of the cat wheel.
- Final Assembly and Testing:
- Once all wheels are in place, carefully mount the cat wheel onto the base. Check that it sits well and rotates smoothly.
- Perform a few test spins to ensure that the cat wheel moves freely and that there’s no friction or wobble.
- Safety Inspection:
- Inspect the entire structure for any sharp edges, loose screws, or potential hazards.
- Make sure the base is stable and won’t tip over when the cat is using the wheel.
Step 4: Incorporating Tech Features (Optional)
- Attaching to the Wheel’s Rim: You could attach a basic pedometer or a motion sensor to the rim or the outer edge of the cat wheel. This sensor can track the rotation of the wheel and calculate the number of steps or distance traveled.
- Floor-Mounted Sensor: Another option is to place a motion sensor on the floor near the wheel. The sensor can detect the wheel’s movement as the cat exercises.
- Smartphone Integration: For a more advanced setup, a digital tracker (like a small IoT device) can be attached to the wheel and linked to a smartphone app. This device can measure the wheel’s rotations, speed, and exercise duration, providing detailed insights into your cat’s activity levels.
- Use of Wearables: Alternatively, you could use a wearable tracker on your cat, like a smart collar, which can track activity levels without needing to modify the wheel.
And voilà! You now have a cat wheel that’s not only a hub of health and happiness for your kitty but also a testament to your DIY skills. Plus, that step counter might just reveal your cat’s inner athlete – who knew?
Affordable Alternatives: Budget-Friendly Cat Wheel Solutions
If DIY feels like a daunting task — whether you’re short on time, patience, or just not a fan of toolkits — there’s a simpler way to keep your kitty active. For those who’d rather skip the day-long project, pre-built cat wheels are a purr-fect solution.
No need to hunt for supplies or puzzle over instructions. These budget-friendly, ready-made wheels are close in price to the DIY route, staying under the $150 mark. So, if DIY isn’t your jam, grab one of these ready-to-go wheels and watch your feline friend leap into action. 🐱🎡
Remember, these are wallet-friendly finds, so while they might not be the fanciest wheels in the feline world, they’re purr-fect for the budget-conscious. They’ll do the trick nicely without clawing through your savings. Affordable, functional, and cat-approved — what’s not to love?
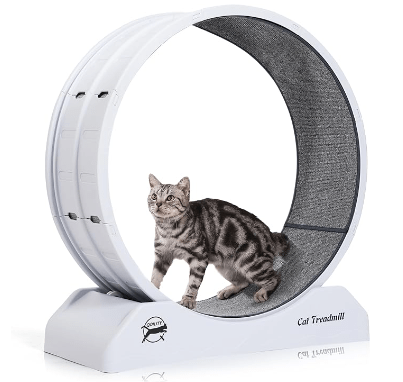
1. Homegroove: A Cost-Effective Choice
Check out the Homegroove Cat Exercise Wheel, a stylish way to get your furball moving! Starting at a cool $139.99, it’s a steal for the quality you’re getting.
This wheel isn’t just about good looks with its natural wood color; it’s a silent, sleek fitness machine designed for your kitty’s indoor adventures. Plus, with a built-in security lock, you’re in control of playtime. And hey, no more worrying about your cat’s little paws getting pinched, thanks to their smart design tweaks.
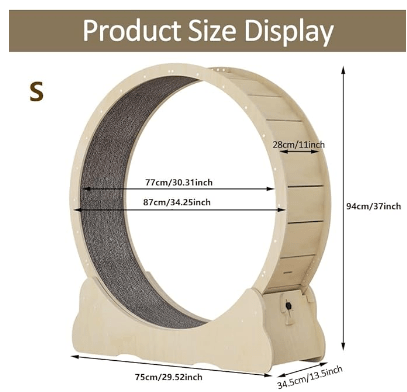
2. QOILITY Wheel: Affordable Quality
Meet the QOILITY Cat Wheel, where simplicity meets fitness for your feline! It’s the ultimate no-fuss, no-tools-required setup, taking just 10 minutes to assemble. Designed for cats of all sizes (31.5″L x 13.4″W x 33.5″H), this wheel is a fantastic indoor exercise buddy, keeping your kitty in tip-top shape. And with a maximum load capacity of 35 pounds, it’s built to last.
Conclusion for DIY Cat Wheel
Whether you’re a hands-on DIYer ready to embark on the journey of building your own cat wheel, or you’re leaning towards snagging a ready-made option like the Homegroove or QOILITY wheel, there’s no shortage of ways to keep your kitty purring with happiness and health. Remember, the DIY cat wheel route can be a fun and fulfilling project, but if time or tools are not on your side, these nifty alternatives are just a click away 🐾🎡.