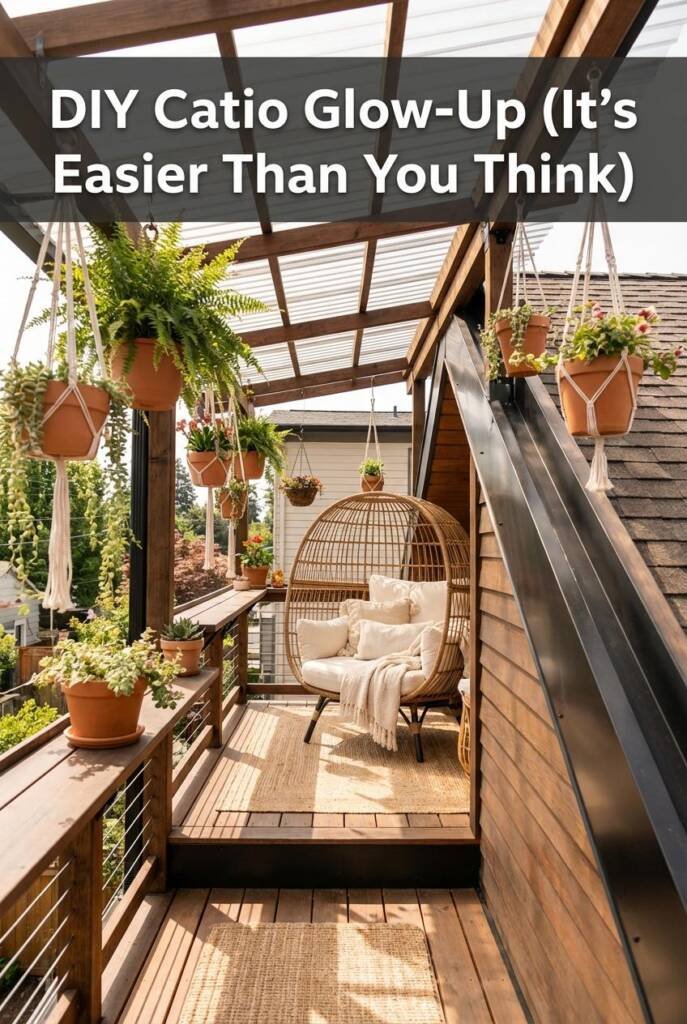
Why a DIY Catio Is the Best Gift You Can Give Your Cat
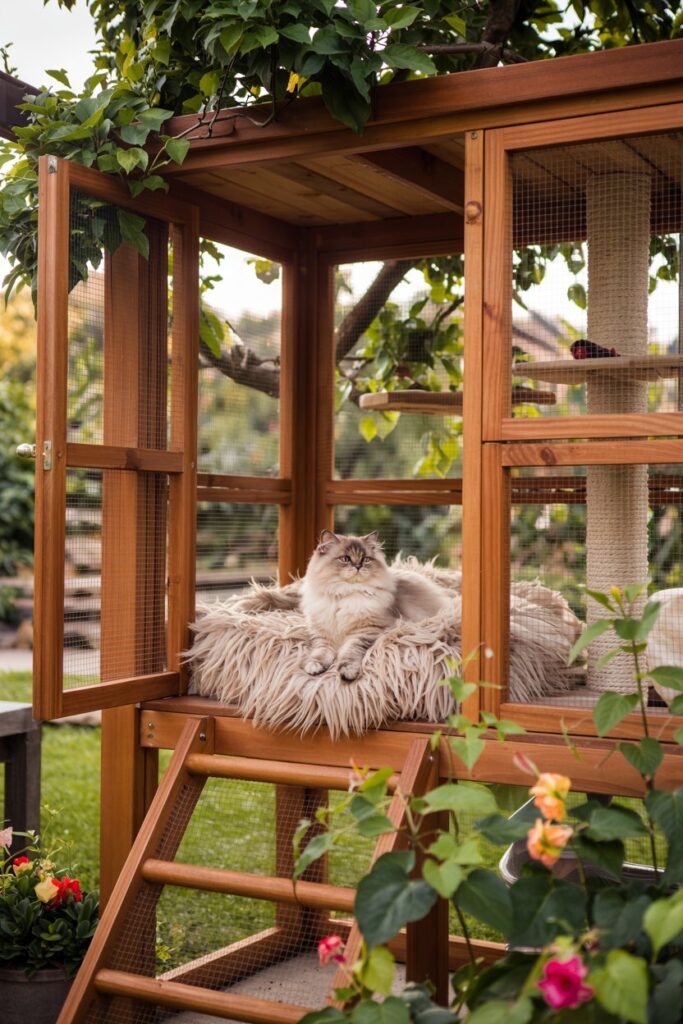
Cats are natural explorers, but letting them roam outside unsupervised comes with risks—cars, predators, disease, and more. That’s where a catio (cat patio) comes in. A well-designed catio gives your furry friend the best of both worlds: safe access to fresh air, sunshine, and stimulation—all while protecting them and the local wildlife.
In this post, we’ll walk you through 14 easy steps to create a catio that fits your home, your space, and your cat’s personality. Plus, we’re sharing 20+ creative ideas to inspire your design, from floating beds to peekaboo bubbles.
Step 1: Envision Your Dream Catio Setup

Before you gather materials or break out the tools, start with a vision. What kind of space do you want to create? Cozy nook? Jungle gym? Chill-out lounge? Your catio can reflect both your cat’s personality and your own design style.
Ask yourself
- Will it be permanent or portable?
- Connected to a window, wall, or door?
- For one cat or a multi-cat household?
This is also the time to list out must-haves:
- Sunny spots for sunbathing
- Shaded areas for rest
- Climbing zones for active cats
- Viewing platforms for birdwatchers


Step 2: Think Like a Cat – What Would They Love?
Cats are wonderfully unique, each with their own personality quirks and preferences. Understanding your cat’s distinct behavior can help create a space that suits their needs and enhance your bond with them. Below, we explore six common cat personalities, so you can better understand your feline friend and what makes them tick!
1. The Climber: Reaching New Heights
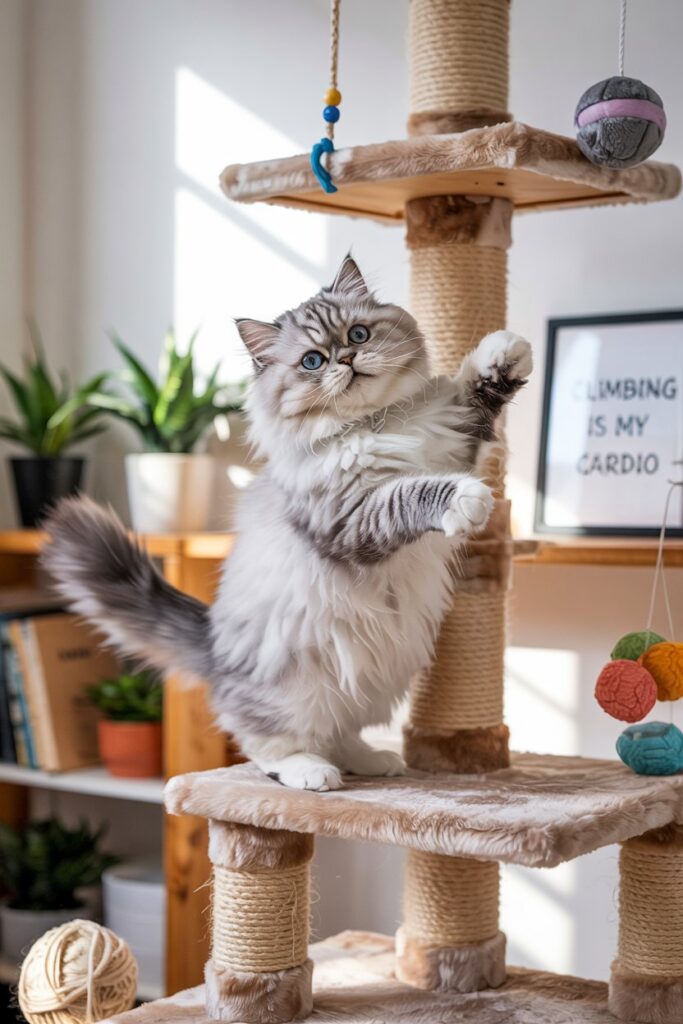
Climbers are naturally adventurous cats that thrive on high places. These cats are constantly seeking vertical spaces, whether it’s a cat tree, bookshelves, or the back of a couch. They love to observe their surroundings from above, which not only makes them feel safe but also satisfies their innate curiosity.
How to Satisfy a Climber

Provide tall scratching posts, cat trees, or wall-mounted shelves to give your climber plenty of opportunities to explore vertically. These additions to your home will help keep them engaged, active, and mentally stimulated.

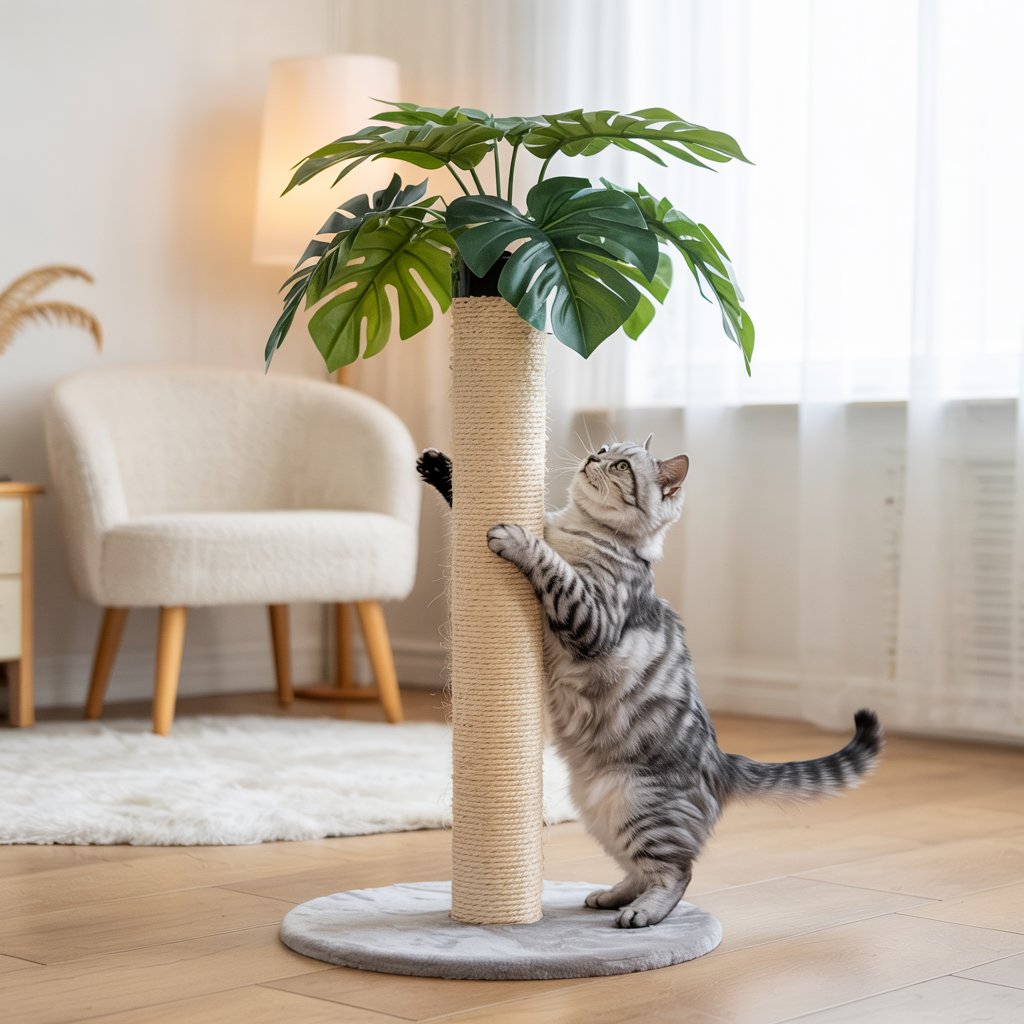
2. The Watcher: The Silent Observer

Watchers are cats that prefer to observe their environment from a distance. They enjoy the view from a cozy perch, keeping an eye on everything happening around them. Whether it’s watching birds outside the window or observing family members, these cats feel secure in their position and prefer to take everything in at their own pace.
How to Satisfy a Watcher
Give your watcher access to a comfy spot by a window with a great view. A window perch or a cozy cat bed near a source of natural light will allow them to enjoy hours of observation and relaxation.
3. The Lap Lover: Snuggle Up

Lap Lovers are affectionate cats that crave constant companionship and love to be near their humans. Lap Lovers like Ragdolls, Birmans, Scottish Folds, Sphynx, and Persians find comfort in sitting on laps, curling up next to their owners, or just being in the same room. They form deep bonds with their people and are the ultimate cuddle buddies.
How to Satisfy a Lap Lover
Make time for regular bonding moments on the couch or your lap. A soft blanket or cushion can make the experience even more enjoyable for both of you. Lap lovers appreciate attention and affection, so they’ll cherish those quiet moments with you.
4. The Explorer: Always Ready for Adventure

Explorers are curious, energetic cats that are always on the move, seeking new spaces to investigate. Whether it’s a new box, a hidden corner, or a catio, these cats love discovering new things and getting into all sorts of adventures.
How to Satisfy an Explorer
Create an engaging environment that encourages exploration. Set up a catio or provide various hideaways and tunnels for your explorer to investigate. Interactive toys and new spaces to discover will keep them mentally and physically stimulated.
5. The Playful Pouncer: Energy in Motion
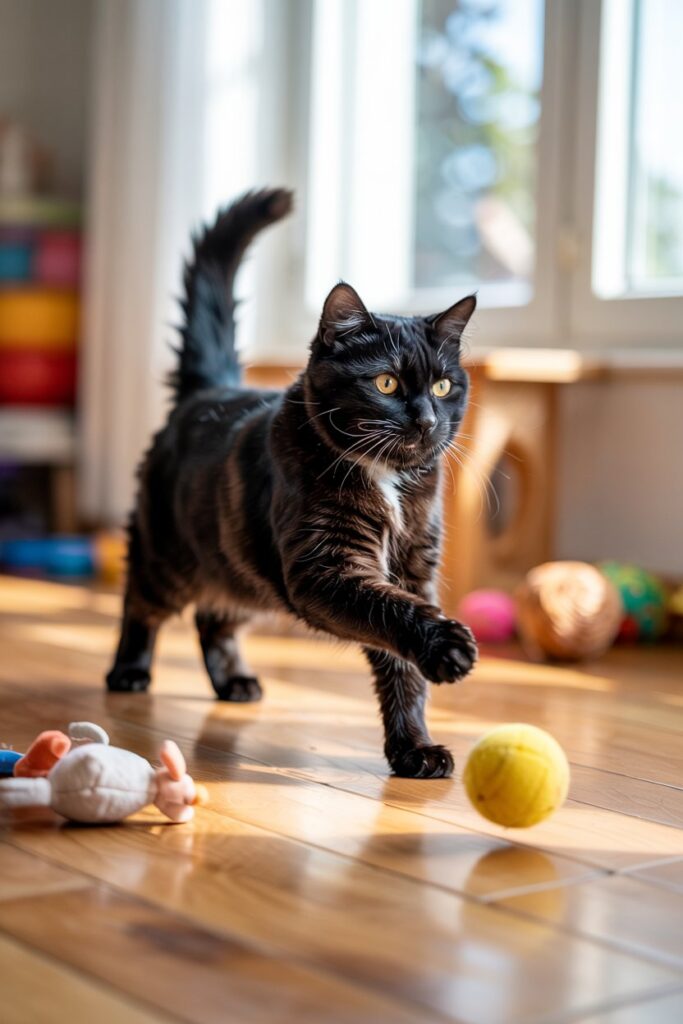
Playful Pouncers are cats that live for playtime. Whether it’s chasing a feather toy, pouncing on a laser dot, or chasing after a ball, these cats are full of energy and love interactive play. Play is their favorite way to exercise and bond with you.
How to Satisfy a Playful Pouncer
Engage in regular play sessions with toys that encourage pouncing and chasing. Feather wands, balls, and interactive toys will help burn off their excess energy, leaving them satisfied and happy.
6. The Solo Snoozer: Champion of Naps

Solo Snoozers are independent cats that prefer peace and quiet. They enjoy their own space, finding secluded corners or comfy spots to curl up and nap the day away. These cats are content with their alone time and are not always in need of attention or interaction.
How to Satisfy a Solo Snoozer
Provide a quiet, peaceful space where your solo snoozer can retreat for naps. A cozy bed or blanket tucked away in a corner will make them feel safe and comfortable. These cats prefer their alone time, so be sure to give them space when they need it.
Which Personality Fits Your Cat?
By understanding these different personality types, you can better meet your cat’s needs and create an environment that enhances their well-being. Every cat is unique, but recognizing their primary personality can help you build a space that caters to their instincts and preferences.
Step 3: Choose the Perfect Catio Location
Selecting the right location for your catio is key to ensuring your cat gets the most enjoyment out of their outdoor space. The right spot should fit both your home’s layout and your cat’s personality and routine. Whether you want to give your cat a spot for sunbathing or a quiet retreat to watch birds, the ideal location makes a world of difference.
Key Considerations
- Visibility: Can you see the catio from indoors? If you’d like to keep an eye on your furry friend while you’re inside, choose a location that allows for easy visibility. Placing the catio near a window or a sliding door can provide both a safe outdoor experience for your cat and peace of mind for you.
- Access: How will your cat enter and exit the catio? Consider a door or window that opens easily for both you and your pet. For instance, a simple cat door connected to a sliding door can make the entry seamless. Access should be convenient for both daily use and any emergency situations.
- Sun and Shade: Think about how your cat enjoys spending their time outside. Some cats love basking in the sun, while others prefer cooler spots. Choose a location that allows you to control how much sunlight your cat receives, especially during hot months. You can use canopy shades, curtains, or plants to help create a comfortable balance.
- Safety: Ensure your catio is located in a place where predators like raccoons, hawks, or stray animals are not a threat. Also, avoid spots near busy roads or areas with high foot traffic to keep your cat out of harm’s way. A location with natural barriers, like fences or walls, can also provide extra security.
Top Catio Location Ideas
- Right Outside a Sliding Door: This offers easy access, making it a convenient and seamless way to let your cat into their outdoor paradise. It’s a great option for small spaces where you want the catio to feel integrated into the home.
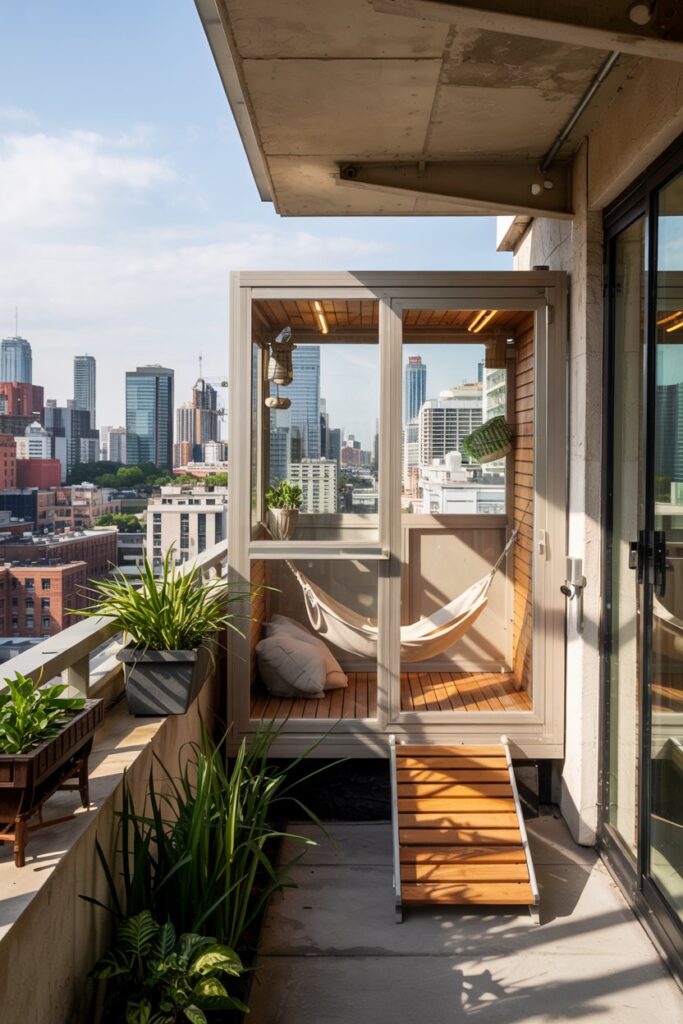
- Attached to a Window or Balcony: Perfect for city dwellers, this option gives your cat the chance to enjoy fresh air and a view without the worry of outdoor dangers. You can add a perch to allow your cat to lounge in the sun while still being safe inside their enclosed space.
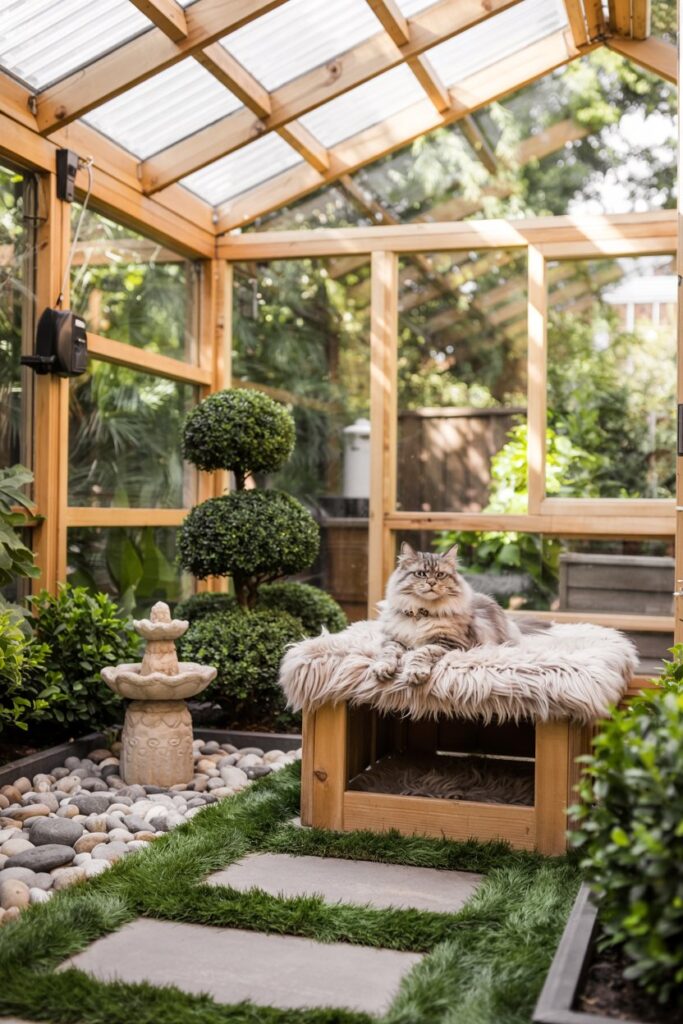
- Freestanding Enclosure in the Yard: If you have a larger space, a standalone catio can provide your cat with plenty of room to explore. It’s a great way to allow them to enjoy the sights and sounds of nature while staying safe.
- On a Deck, Patio, or Porch: This is a perfect location for those who want to keep the catio closer to the home’s living space but still want to give their cat more outdoor time. These locations can often be easily enclosed with walls or railings to create a safe and accessible outdoor retreat for your cat.


Step 4: Decide on Size and Complexity
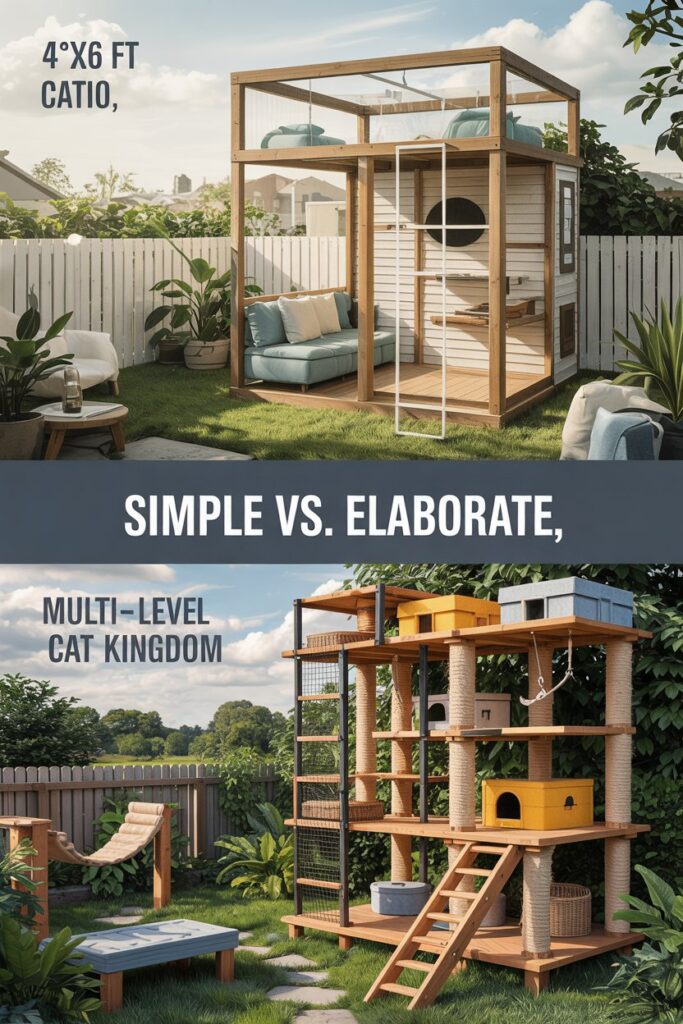
Catios can range from a basic setup with a shelf and perch to an elaborate cat kingdom with tunnels, towers, ramps, and bridges. Your catio’s size and features should match your home’s space and your cat’s needs. Here’s how to decide:
- Simple or elaborate builds: For smaller spaces, consider simple builds like a window perch or small balcony rail enclosures. For larger areas, you can create a “cat playground” with multiple levels, tunnels, and climbing poles.
- Measure your space: Sketch out your catio’s dimensions to fit the available area. Take into account any windows, doors, and obstacles.
- Tailor size to your cats: For a single or two‑cat home, a smaller space (around 4×6 feet) with perches or shelves might be enough. If you have more cats, aim for a larger area (12–16 square feet per cat) and include multiple levels to give them room to roam.
- Create activity zones: Think about where your cats will lounge, climb, scratch, and hide. Incorporating zones helps keep your cats engaged.

Step 5: Consider Safety and Predator-Proofing

When selecting materials for your catio, you’ll want to prioritize safety, durability, and design to ensure it lasts and looks great in your outdoor space.
- Frame Material: Choose durable materials like treated wood, steel, or PVC. Wood offers a more natural look but requires maintenance. Steel or aluminum frames are strong and weather-resistant, while PVC is lightweight and low-maintenance.
- Panel Options: Use heavy-duty wire mesh (at least 1″ galvanized or PVC-coated) for a secure enclosure. This mesh ensures that your cats are safe from predators while still giving them plenty of airflow and visibility. For ground-level catios, bury the mesh in an L-shape around the base to prevent digging and escaping.
- Avoid Wide Gaps: Be mindful of the gaps in your mesh. Wide gaps can allow predators like raccoons or snakes to enter, or even give your cat a chance to escape. Stick with narrow gaps for extra security.
- Flooring Choices: Go for slip-resistant flooring options, such as artificial turf, composite decking, or weather-resistant wood, ensuring it is comfortable for your cats. Ensure your flooring has proper drainage to avoid water pooling, which could cause mold or mildew.
- Safety Features: Install a self-closing door for human access to prevent accidental escapes. This is especially important if you live in an area where your cat might be at risk from outdoor predators or traffic.
- Aesthetic Considerations: Choose materials that blend well with your home’s exterior and outdoor décor. Consider adding greenery like cat-safe plants to soften the catio’s look, or decorative touches like LED lighting for evening ambiance.


Step 6: DIY or Pro Help? Deciding How to Build Your Catio
With your plan, location, size, materials, and safety features decided, it’s time to choose how you’ll bring your catio to life. Both DIY and professional installation have their perks:

The DIY Route
Building your own catio can save money, sharpen your skills, and let you tailor every detail to your cat’s needs. If you already own—or can borrow—basic woodworking tools, you’re halfway there.
Why Go DIY?
- Budget‑Friendly: You control material quality and source deals on lumber and mesh.
- Fully Custom: From perch heights to tunnel shapes, everything reflects your vision.
- Rewarding Project: There’s real pride in watching your cat explore a space you built.
Essentials for Your Workshop
• A quality saw (circular or miter) for clean cuts
• Power drill with assorted bits (pilot holes prevent wood splitting)
• Measuring tape + level to ensure each shelf is straight
• Heavy‑duty staple gun for fastening mesh securely
• Safety gear: gloves, goggles, and ear protection
Tip: Follow a trusted DIY catio guide—many include cut lists, shopping lists, and step‑by‑step photos.
Hiring a Pro or Prefab Kit
If you’d rather skip the hammer and hardware store trips, local catio specialists and ready‑made kits offer turn‑key solutions.
Why Choose a Pro/Kit?
- Speedy Setup: Many kits install in a day; pros can finish multi‑level builds in a weekend.
- Expertise: You get built‑in predator protection, weatherproofing, and code compliance.
- Warranty & Support: Prefab manufacturers often include guarantees; installers may offer maintenance.
What to Look For
• Local Catio Builders: Search “catio installation” or “Custom Catios” in your area.
• Prefab Options: Compare styles—from simple window boxes to elaborate enclosures.
• Installation Services: Some companies deliver and set up; others walk you through a fast DIY install.
Step 7: Choose the Right Materials
Material selection affects the look, feel, and safety of your catio. Here’s a breakdown of the top choices, based on durability, weather-resistance, and cat comfort.
Roofing
- Bronze polycarbonate (10mm) – Offers shade and UV protection; used in many high-end catios.
- Clear polygal – For max sunlight; great for sun-loving cats.
- Opaque or tinted roofing – Ideal for cats who prefer cooler, shaded lounging spots.
Wire Mesh
- 2″x2″ galvanized (hot-dipped) – Strong, rust-resistant, and provides ~87% visibility.
- PVC-coated mesh – Softer to the touch, great for aesthetics and easier on paws.
- 1″ or ¼” mesh – Offers more protection in areas with small predators or insects.
Flooring + Shelving Surfaces
- Outdoor industrial carpet – Prevents slipping and is easy to clean. Choose darker colors like gray to hide dirt.
- Painted plywood – For shelves and ramps. Cut to size and corner-shaped to wrap around posts.
Structural Frame
- Redwood – Naturally resistant to insects and rot, redwood is durable and beautiful. It costs more but lasts for years.
- Pressure-Treated Lumber – Affordable and available everywhere. Just be sure to seal or paint it with pet-safe finishes to prevent chemical exposure.
- Cedar – Another rot-resistant favorite. It’s lightweight, smells great, and repels some insects naturally.
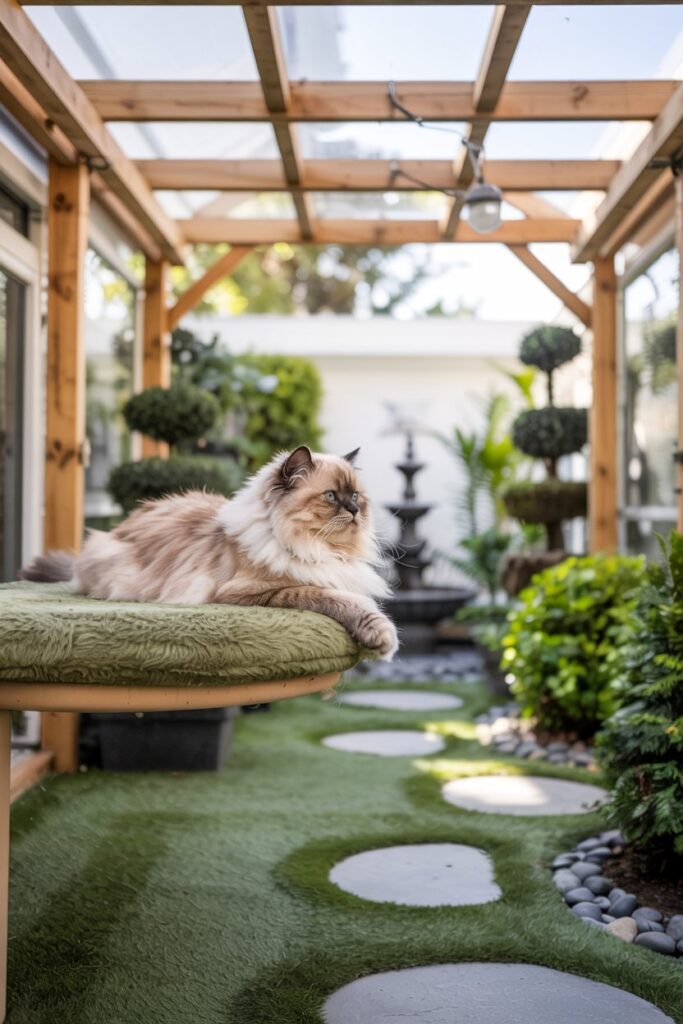
Bonus Features
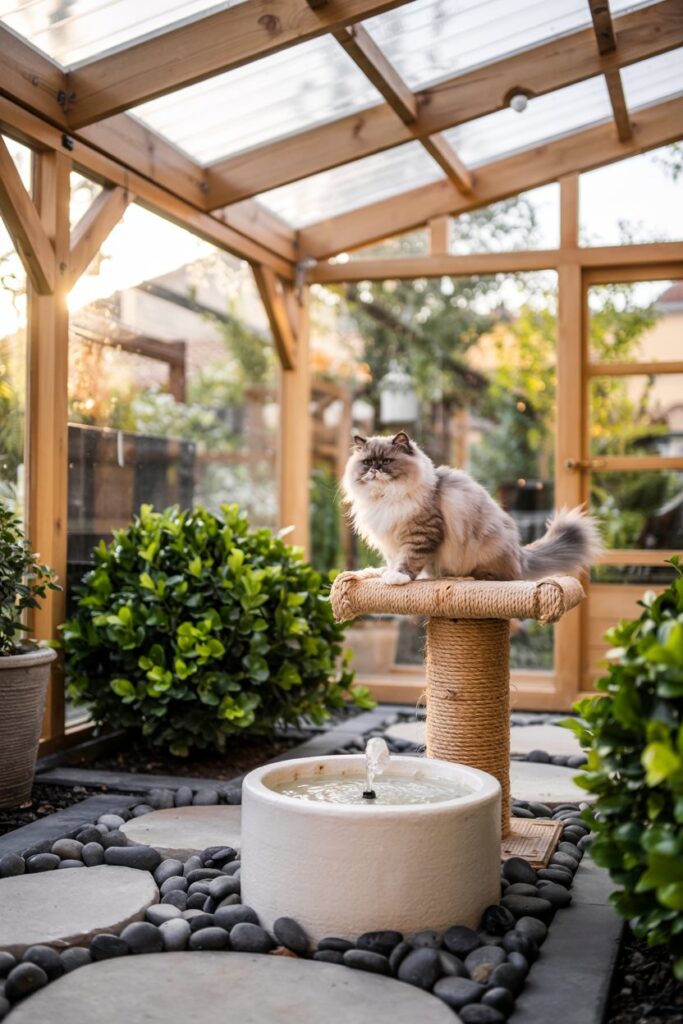
- ABS pipe + synthetic rope – For climbing poles.
- Peekaboo bubble beds – For next-level cat lounging.
- Floating beds and cat ladders – Add movement and height.
Step 8: Decide How Cats Will Access the Catio
The catio isn’t just about what’s inside—how your cat gets in and out is equally important. There are four main access methods, each with its own pros:
- Sliding glass door insert: Ideal for renters or temporary builds. Inserts require no cutting and sit securely in the track.
- Wall-mounted cat door (most popular): 60% of cat parents go this route. A small cut through the wall gives your cat seamless, secure access. The door can be covered or locked as needed.
- Window insert: Great for window box catios or vertical wall-mounted designs.
- French door cutout: Custom solution—cut a cat flap in a single glass pane. Best done by a pro.
Make sure to position the entrance in a way that encourages exploration. Most cats take to the catio quickly when the access point feels like an extension of their home.
🛠️ Before You Start: Your Complete Supply Checklist
You’ve planned your perfect catio—now it’s time to gather everything you need! This checklist covers a standard 6’×4′ catio. Adjust quantities for larger or smaller builds.
📦 Materials Shopping List
Lumber & Structure:
- 8× 4×4 posts (8 feet long) – for corner supports
- 16× 2×4 boards (8 feet long) – for frame
- 2 sheets of ¾” plywood – for shelves and ramps
Covering & Protection:
- 1 roll galvanized wire mesh (50 feet, 1″ spacing)
- 2 polycarbonate roof panels (6’×2′)
- 24 sq ft outdoor carpet (gray or brown recommended)
Hardware:
- 1 box 3″ exterior screws
- 1 box 1½” screws
- Heavy-duty staples
- 12-16 L-brackets for shelves
- Door hinges & self-closing latch
- Exterior wood stain or paint (pet-safe, low-VOC)
🔧 Tools You’ll Need
- Power drill with assorted bits
- Circular or miter saw
- Measuring tape & level
- Heavy-duty staple gun
- Safety glasses & work gloves
⏰ Time & Skill
Total Time: 2-3 weekends (12-18 hours)
Skill Level: Beginner to Intermediate
Estimated Cost: $300-$600 depending on materials
💡 Pro Tip: Buy lumber from a local hardware store and ask them to make your cuts—most do it for free and it saves tons of time!
Step 9: Frame Construction – Build the Bones of Your Catio
1. Cut Your Lumber (1 hour)
Cuts needed:
- Four 4×4 posts at 6 feet (vertical corners)
- Four 2×4s at 6 feet (top/bottom length)
- Four 2×4s at 4 feet (top/bottom width)
- Six 2×4s at 6 feet (wall bracing)
Pro Tip: Label each piece with painter’s tape as you cut (example: “Top-Front,” “Post-Left-Front”)
2. Build the Base Frame (1-2 hours)
Steps:
- Lay the four base 2×4s on the ground in a rectangle (6’×4′)
- Drill pilot holes at corners to prevent splitting
- Connect corners with 3″ screws (2 screws per corner)
- Check that corners are square using the 3-4-5 triangle method
- Measure diagonals—they should be equal
Common Mistake: Don’t skip checking for square. An uneven base means wobbly walls.
3. Attach Vertical Posts (1 hour)
Steps:
- Stand one 4×4 post in each corner of the base frame
- Have a helper hold posts upright while you check with level
- Attach each post to base with four 3″ screws
- Add temporary diagonal braces to keep posts vertical
Safety Note: Never work alone when raising posts. Always have a helper.
4. Add the Top Frame (1 hour)
Steps:
- Attach 2×4s between the tops of posts (same as base)
- Work on one side at a time
- Use 3″ screws, two per connection
- Double-check level before screwing in place
- Remove temporary braces once top frame is secure
5. Secure to House (30 minutes)
Steps:
- Position frame against house wall
- Mark drill holes on wall (every 2 feet)
- Use appropriate anchors for your siding type:
- Wood siding: 3″ exterior screws
- Stucco: concrete anchors
- Brick: masonry screws
- Attach with at least 4 connection points
Design tip: Add a creative twist, like a “peekaboo” corner that wraps around your deck, or a tall viewing nook up high.
Step 10: Interior Features – Build a Playground, Not Just a Box

1. Install Shelves (2-3 hours)
Spacing Guide:
- Bottom shelf: 18″ from ground
- Middle shelf: 36″ from ground
- Top shelf: 54″ from ground
Steps:
- Cut plywood into 18″×18″ squares for corner shelves
- Cut rounded corners (4″ radius) to fit around posts
- Sand all edges smooth
- Attach L-brackets underneath each shelf
- Screw brackets to posts with 1½” screws
Weight Tip: Each shelf should support at least 20 pounds. Use two L-brackets per shelf.
2. Build a Ramp (1 hour)
Steps:
- Cut plywood strip 10″ wide by 4 feet long
- Attach thin wood strips across ramp every 6″ (for grip)
- Or cover entire ramp with outdoor carpet
- Secure carpet with staples every 3″
- Mount ramp at 35-40 degree angle between shelves
Common Mistake: Ramps steeper than 45 degrees are too difficult for older cats.
3. Make a Rope Climbing Pole (1 hour)
Steps:
- Get a 6-foot section of 4″ ABS pipe
- Apply wood glue in a spiral around pipe
- Wrap synthetic rope tightly from bottom to top
- Secure rope ends with heavy-duty staples
- Attach pipe vertically between base and ceiling frame
Pro Tip: Wrap rope tightly—loose rope will unravel quickly.


Step 11: Install the Roof (Time: 1-2 hours)
Steps:
- Place polycarbonate panels across top frame
- Overlap panels by 2″ if using multiple pieces
- Pre-drill holes every 12″ along edges
- Attach with screws and rubber washers (prevents cracking)
- Angle panels slightly (½” drop per foot) for water runoff
- Apply weatherproof sealant along all seams
Common Mistake: Don’t over-tighten screws—polycarbonate expands in heat and needs room to move.
Step 12: Attach Wire Mesh (Time: 2-3 hours)
Steps:
- Start at one top corner of frame
- Unroll mesh along top, pulling tight
- Staple every 4-6″ along top rail
- Pull mesh down and staple bottom rail
- Work your way around entire frame
- At seams, overlap mesh by 3″ and double-staple
- Trim excess mesh with wire cutters
For Ground-Level Catios:
- Dig L-shaped trench around perimeter (12″ deep, 12″ out)
- Bury extra mesh in trench
- Backfill with soil
Pro Tip: Wear gloves—cut mesh edges are sharp!
Testing: Push firmly on mesh every few feet. It shouldn’t flex more than 1-2″.
Step 13: Finishing Touches
1. Install Door (1 hour)


Steps:
- Cut opening in mesh on one side (36″ tall × 24″ wide)
- Build simple door frame from 2×2s
- Attach mesh to door frame with staples
- Mount door with outdoor hinges
- Add barrel bolt latch at top
- Install self-closing spring if desired
Pro tip: Install spring-loaded hinges or a self-closing latch to ensure the door always shuts behind you—preventing curious kitties from slipping out unnoticed.
2. Add Carpet to Surfaces (1 hour)

Steps:
- Measure each shelf and ramp
- Cut carpet pieces 1″ larger on all sides
- Apply outdoor carpet adhesive or use heavy-duty staples
- Fold edges under and staple
- Let adhesive dry 24 hours before use
Color Recommendation: Choose gray or brown carpet—hides fur and dirt better.
🧰 Quick install tip: Use a staple gun or outdoor adhesive to secure the carpet at all edges and corners. If using adhesive, make sure it’s non-toxic and pet-safe.
3. Paint & Seal


Steps:
- Sand rough spots on wood
- Apply wood primer to bare wood
- Let dry 2 hours
- Apply 2 coats of exterior paint (4 hours apart)
- Seal all cut edges and joints with exterior caulk
- Let cure 48 hours before allowing cats inside
Pet-Safe Paint: Look for low-VOC or zero-VOC exterior paints.
Style tip: Match your catio’s paint to your home’s trim or siding for a cohesive backyard look. Or, go bold with a pop of color—sage green, navy blue, or even terra cotta tones look amazing in garden settings.


Don’t forget to paint or seal any cut ends of wood, brackets, or exposed edges. These areas are prone to moisture damage and will last longer with proper protection.
Step 14: Introduce Your Cat to the Catio – Make It a Safe New World
You’ve built it—now it’s time to let your cats explore. The goal is a stress-free transition from indoor to outdoor time.
- Let them find it themselves through the access point (wall door, sliding door, etc.).
- Place treats, toys, or catnip inside to create positive associations.
- Join them at first—sit outside or just watch nearby to show it’s safe.
- Watch for confidence cues: tail-up walking, sniffing, sunbathing. These mean success.
Start with short sessions and gradually increase the time. Some cats may jump right in; others might take a few days or even weeks. Be patient—once they bond with the space, they’ll love it.
Ready to Build a Catio? You’ve Got the Blueprint and 20+ Ideas to Get Started
By now, you’ve got more than just inspiration—you’ve got a full blueprint and over 15 clever ideas to make your catio purr-fect for your feline bestie. Whether you’re crafting climbing ramps from scratch or picking out the coziest sunbathing shelf, remember: this isn’t just a project—it’s a love letter to your cat’s happiness.
From sizing and safety to interior fun zones and pro-level add-ons, we’ve walked you through every major step. Now it’s your turn to bring the vision to life.
At Sweet Purrfections, we believe being a cool pet parent means going the extra mile—and maybe picking up a power drill while you’re at it 😸. We’re right here cheering you on as you build a safe, stylish outdoor space your cat will adore.
So what’s next?
- Map out your layout and pick your ideal location
- Decide if you’ll DIY or go prefab
- Gather materials—or bookmark your fave prefab kits
- Add your personal flair with playful, cozy features
No matter how big or small your catio ends up, one thing’s for sure: your cat’s about to level up their life. And hey, you might just become their favorite human all over again.